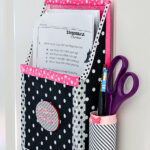
DIY Magnetic Hanging Homework Holder – Cute Decor Project
Do you have a homework monster in your home? The kind that eats the school papers leaving them nowhere to be found? We have one! My son has a habit of misplacing his homework and then gets super frustrated when he can’t find it. Last year, I had him keep his homework and pencil in his backpack so he always knew where it was. Of course he’d still misplace it so this year I thought I’d make a magnetic hanging homework holder to help organize all his school papers.

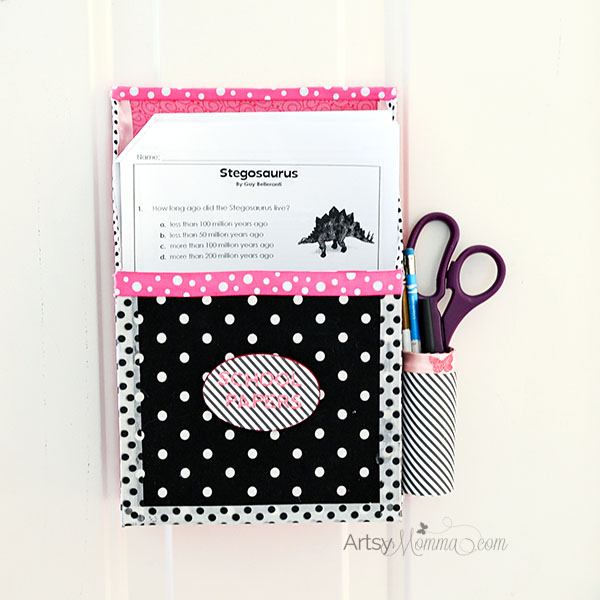
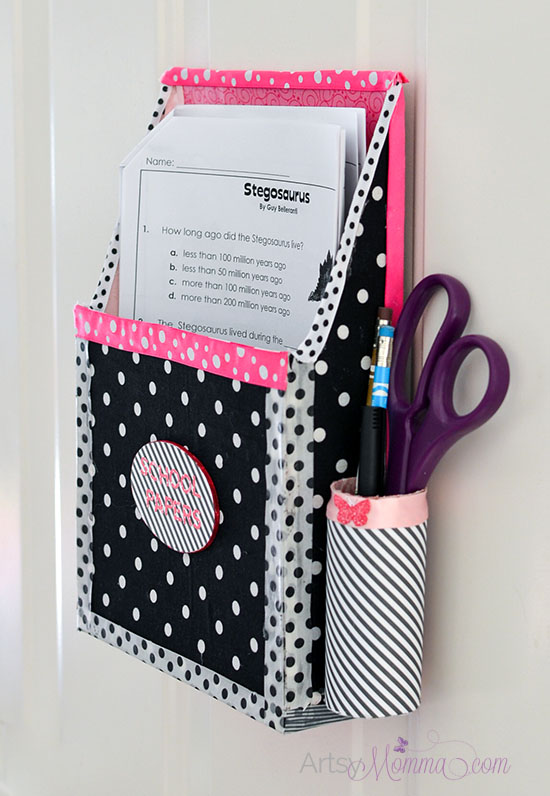
Our new homework/school organizer hangs on the front door right where it can be seen from the kitchen table (aka homework table). It’s also conveniently located on the way out the door hopefully as a reminder to take it to school when needed.
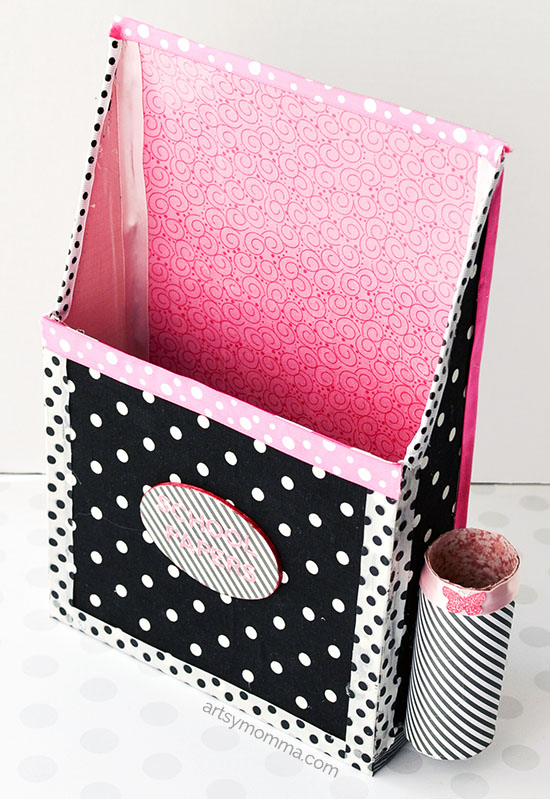
It also features a recycled pencil holder made from a cardboard tube. Now Big Brother can keep at least one pencil in there with the hopes of it not getting lost or buried in a backpack.
See also: Must Have Supplies for Distance Learning At Home
This hanging homework holder also works great for the refrigerator! If your refrigerator has too many things on it and the house door isn’t magnetic, you can skip the magnet part and make it to hang with a nail or sit on a desk – perfect for a homework station!
Recycled Cereal Box Holder Craft Supplies
*As an Amazon associate I earn from qualifying purchases. We are also a Xyron Design Team Member.
- Xyron Creative Station
 with
with - permanent adhesive cartridge
- magnet/laminate cartridge
- fabric
- patterned cardstock
- scissors
- cereal box
- cardboard tube
- hot glue gun
- ribbon
- wood oval; small
- ink pad
- die-cutting machine and letter cutting dies (optional)
 with
with 


 ; small
 (optional)
How to make the Magnetic Hanging Homework Holder
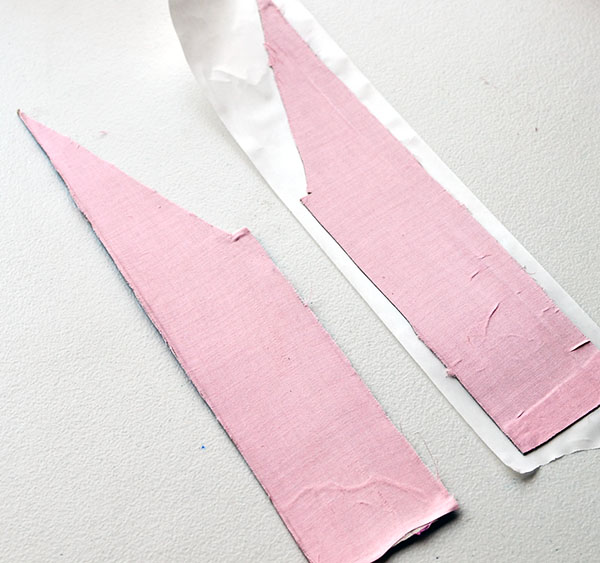
Cut the cardboard box sides on a diagonal stopping about a third if the way down.
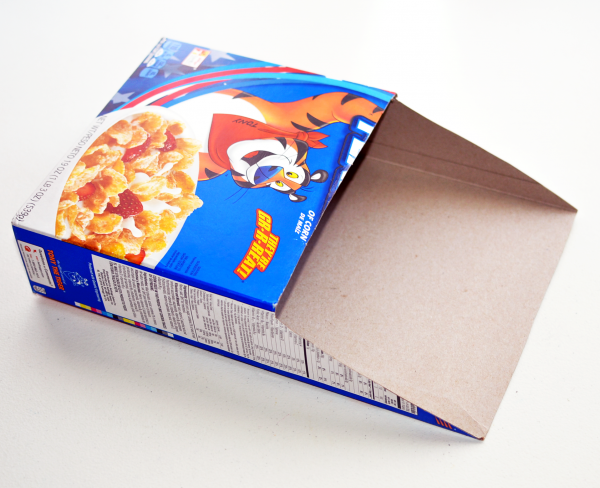
You can do the fabric two ways with one being to make the box flat and cover it. I wanted it to be all different patterns and colors so I cut all the pieces separate making: 2 sides with the angled, a full-sized back piece, and the shorter front piece with the bottom still attached. I thought it would make the bottom a little bit studier having one of the sides uncut.
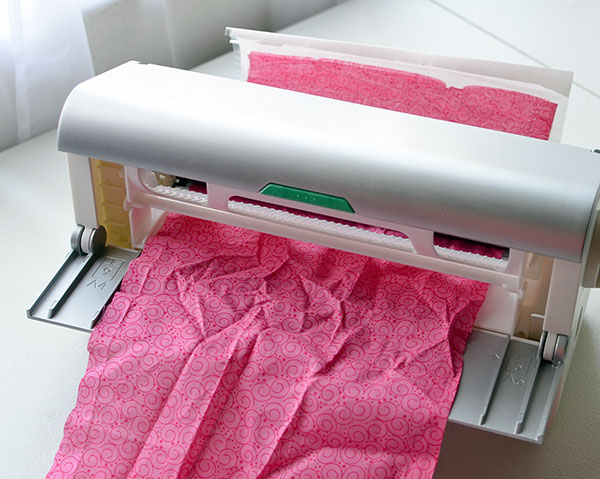
Take the back piece and trace it on to a patterned fabric of choice. Cut this out and send it through the Xyron Creative Station. The Creative Station is so awesome for projects like this! Not only does it cover from edge-to-edge with adhesive, it’s so much easier than hot glue to keep from wrinkling, fingers from accidentally getting burned, and a web of glue strings to pick off. It doesn’t use heat to use it making it perfect for even young children to use (with supervision).
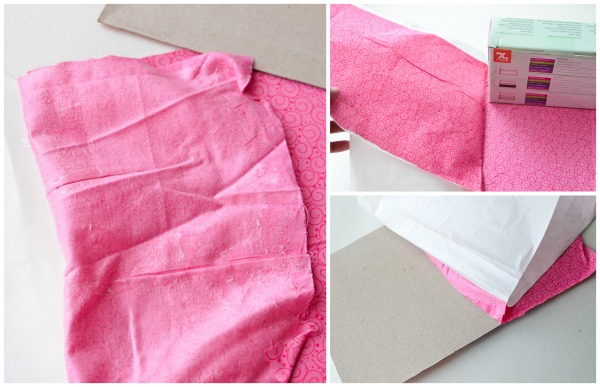
Once the fabric is through, peel it off a little at a time sticking it to the full-sized back piece. I used a small box and my movie rewards card to smooth the fabric while pulling off the back. Trim off any overhang/frays.
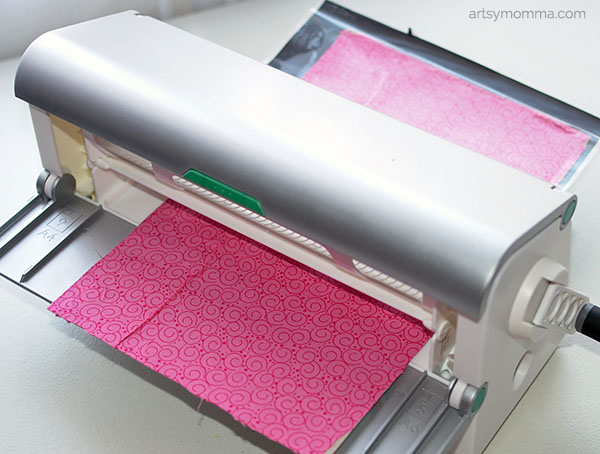
Then, change the Xyron Creative Station cartridge to the laminate/magnet cartridge. Send the fabric-covered cardboard through making sure the uncovered side is face down. Trim away any excess. The fabric should now be laminated with the magnetic sheet adhered to the backside.
Cover the other three cardboard pieces with fabric on both sides as well as on the bottom section that attached to the square cardboard. This time I tried a different way. Instead of sending the fabric through the Xyron Creative Station, I sent the cardboard pieces through. Then I pulled the fabric over the top (pull backing off first), pressed it down, and cut it with a sharp scissors. Both ways work great!
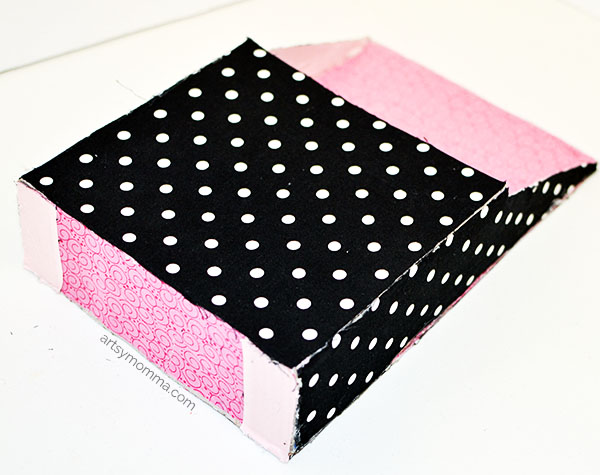
Hot glue the now fabric-covered cardboard pieces together to create your homework holder.

Hot glue strips of ribbon to cover the cracks. I did the inside as well.
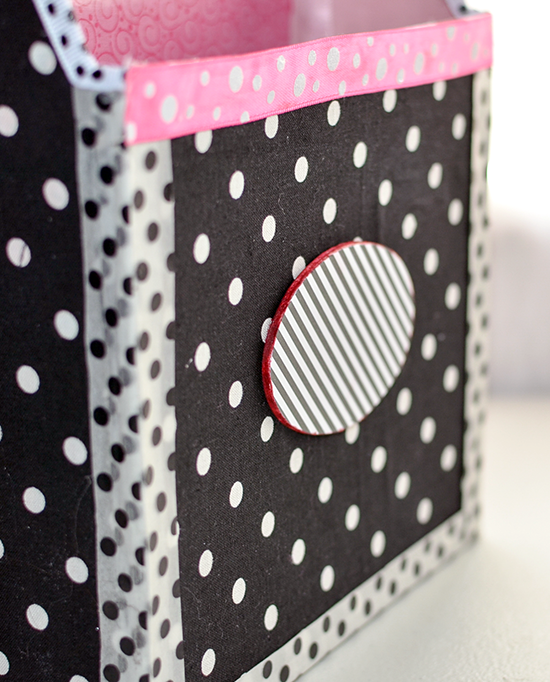
I used a small, wood oval on the front of the homework holder that reads ‘School Papers.’ First, I sent the oval through the Creative Station. Then I added striped cardstock and cut around the oval.

I added the words using our Diamond Press and small letter die-cuts. The Xyron adhesive makes gluing the tiny pieces easy and mess-free. You could also stamp, write, or paint the letters on. The oval is hot glued in place.
Upcycled Cardboard Tube Pencil Holder Instructions
Cover the outside and inside with fabric or cardstock. Add ribbon to jazz it up a bit and any other embellishments you’d like. Hot glue a cardboard circle to the bottom and then run the hot glue along one side. Press on to the side of the upcycled cereal box holder.
Now it’s ready to hang on the front door or refrigerator! Add pencils, homework, school papers, scissors, etc. The laminated back piece can also be used for reminder notes by using a dry erase marker.
Fingers crossed that the homework monster stays away this year, haha! I’m hoping it teaches Little Sister, who is starting kindergarten, to keep her school things organized rather than fall into the misplaced/forgetful homework scenario.
This DIY Magnetic Hanging Homework Holder could alternatively be used for bills, magazines, or anything else you find it usable for!


Muy interesantes , economicos y faciles, saludos desde el Perú, GRACIAS