DIY Jungle Animal Stamped Jewelry – Laminated Kids Craft
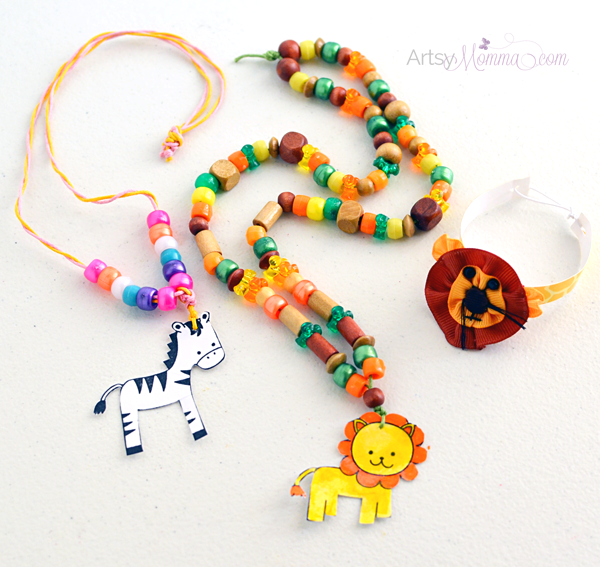
Here’s another creative use for any stamps you happen to have – make your own stamped jewelry! Not only will kids love to wear their own handmade creations (or made by you), these could also be used as a party favor/party activity, for imaginative play, or given to a friend. We made a laminated jungle bracelet and beaded necklaces.
For this project we used our jungle animal stamps. Change these up for other stamps you already have (or have had an eye on!). The possibilities are endless!
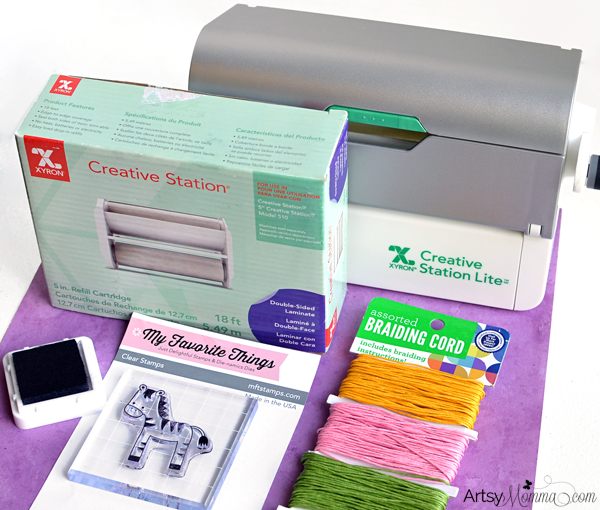
Different Supplies Used to Make the Jungle Jewelry for Kids
*This post contains Amazon affiliate links. Additionally, we received many of the products and/or compensation from brands whom we work with (Xyron Design Team & CraftProjectIdeas.com). Please read our full disclosure policy here.
- Xyron® Creative Station Lite

- Double-sided Laminate Cartridge
- scissors
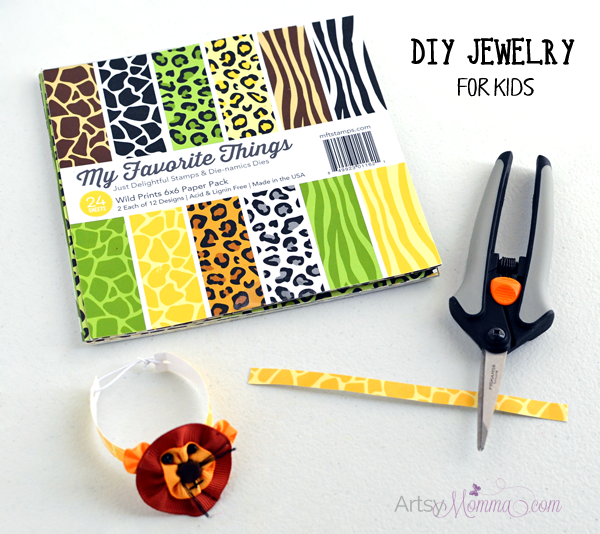
- patterned paper – We used the Wild Prints Paper Pack from My Favorite Things.
- stamps – We used Miss Tina Wild Things, also from My Favorite Things.
- ink pad
- colored pencils
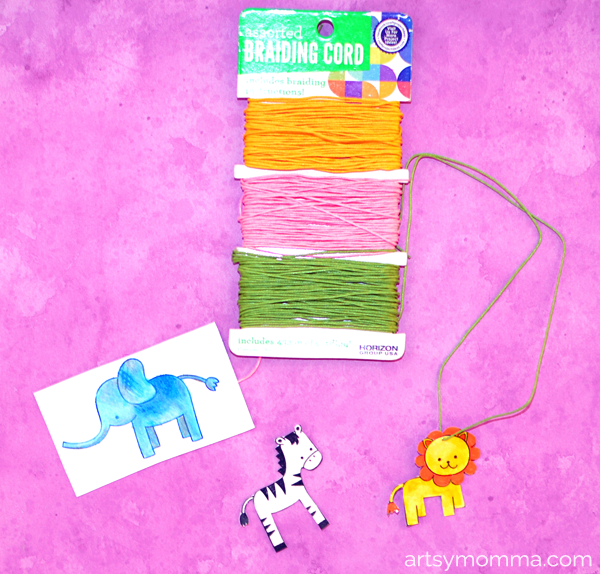
- beads; Pictured: Pony Beads & Wood Beads from Horizon Group which can be purchased at Walmart.
- jewelry cord and/or elastic cord; Pictured: Braiding Cord & White Elastic Cord from Horizon Group which can be purchased at Walmart.
- white cardstock


 – We used the
  from My Favorite Things.
 – We used Miss Tina Wild Things, also from My Favorite Things.

 ; Pictured: Pony Beads & Wood Beads from
  and/or
  ; Pictured: Braiding Cord & White Elastic Cord from
How to make the Laminated Stamped Jewelry Craft:
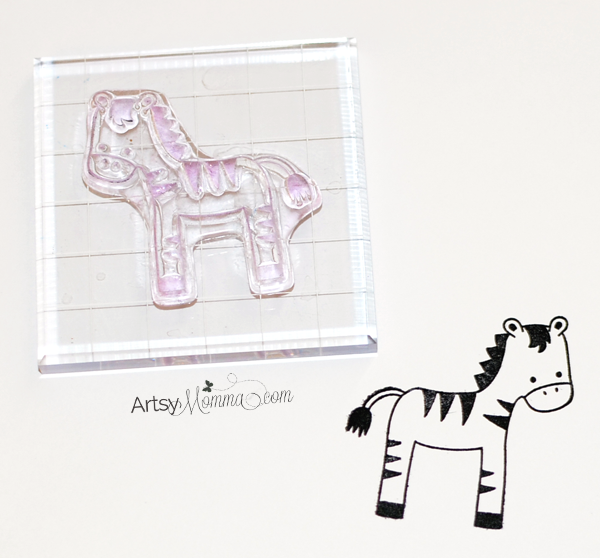
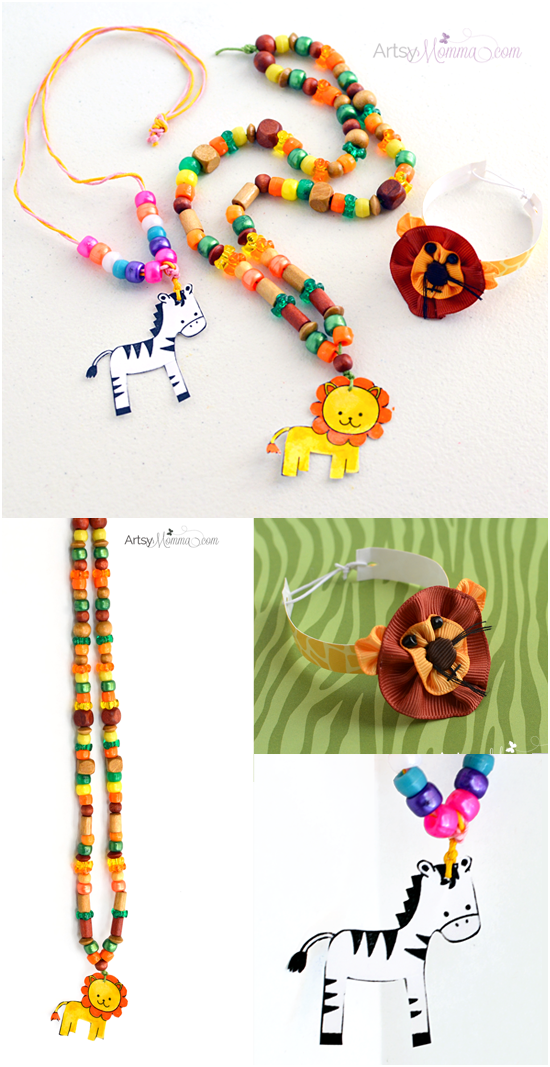
Choose stamps to use for the necklace craft. Make prints using an ink pad, pressing the image onto a sheet of white cardstock.
Once dry, color in the stamps using colored pencils or even watercolor would be easy enough for kids to use. Older kids could get creative using any of the other popular techniques for coloring in stamps.
Send these through the Xyron® Creative Station Lite that is filled with the double-sided laminate cartridge. Cut around the laminated images. Make a small hole at the very top using a sharp point such as a craft knife (adults only).
Thread string or jewelry cord through the tiny hole making sure it’s long enough for the child’s head to go through. Add beads, whether you fill up the whole string or just add a few, it’s up to you!
This makes a great fine motor activity for preschoolers/kindergartners as well as a fun patterning activity.
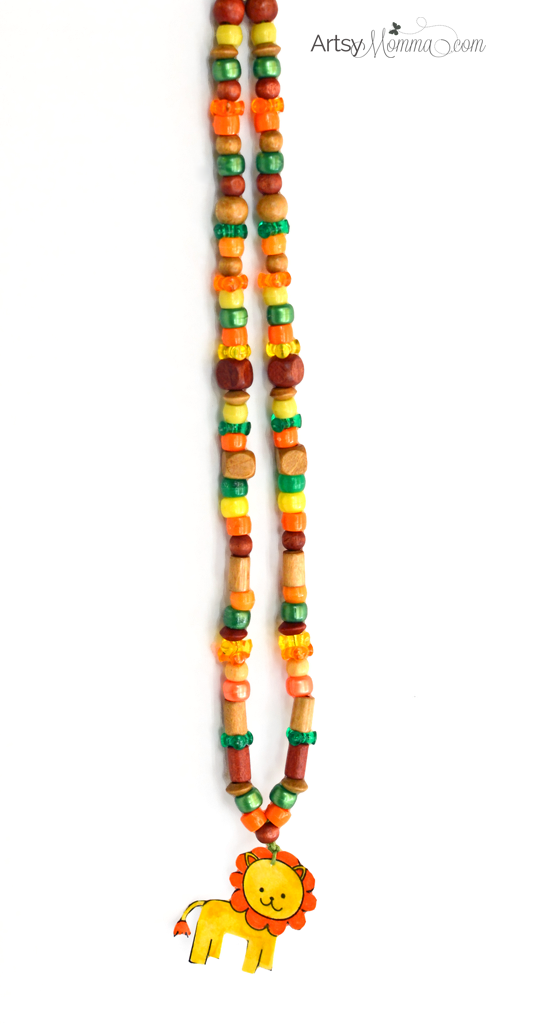
When finished, tie the ends with a knot. Now it’s ready to be worn!
How to make the laminated bracelet:
Send a strip of patterned paper through the Creative Station. Cut this into thinner strips. Poke a hole onto each end.
For Little Sister’s bracelet, we added a ribbon lion embellishment that we happen to already have on hand. I have seen tutorials for these around the web, but you could also use another stamped image in place of it.
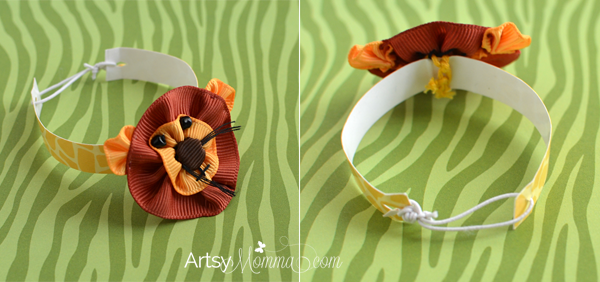
Thread elastic cord through the lion as well as the holes on the strip of patterned paper. Secure it with knots. If you can’t get your hands on some elastic cord, you could use the same string/cord you used for the necklace. However, you will need to measure it before securing to assure that the wearer’s hand will fit through it.
Head over to our DIY Zoo Playdough Set for another creative use for the stamps used in this DIY Jungle Animal Stamped Jewelry tutorial.