DIY Mini Travel Game – Marble Maze & Tic, Tac, Toe
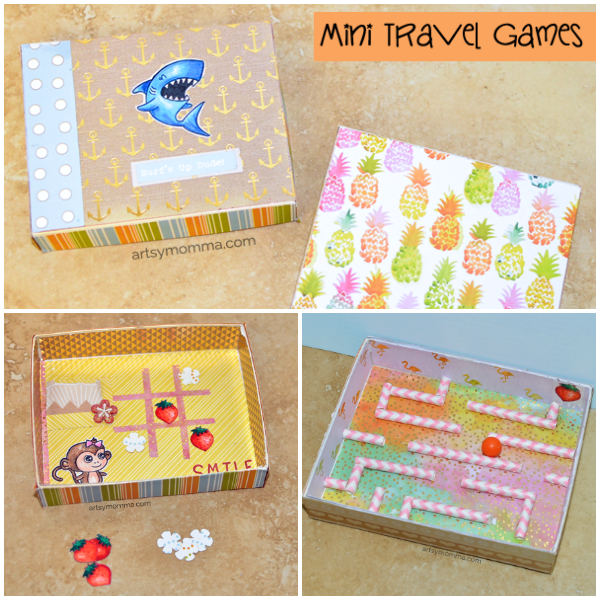
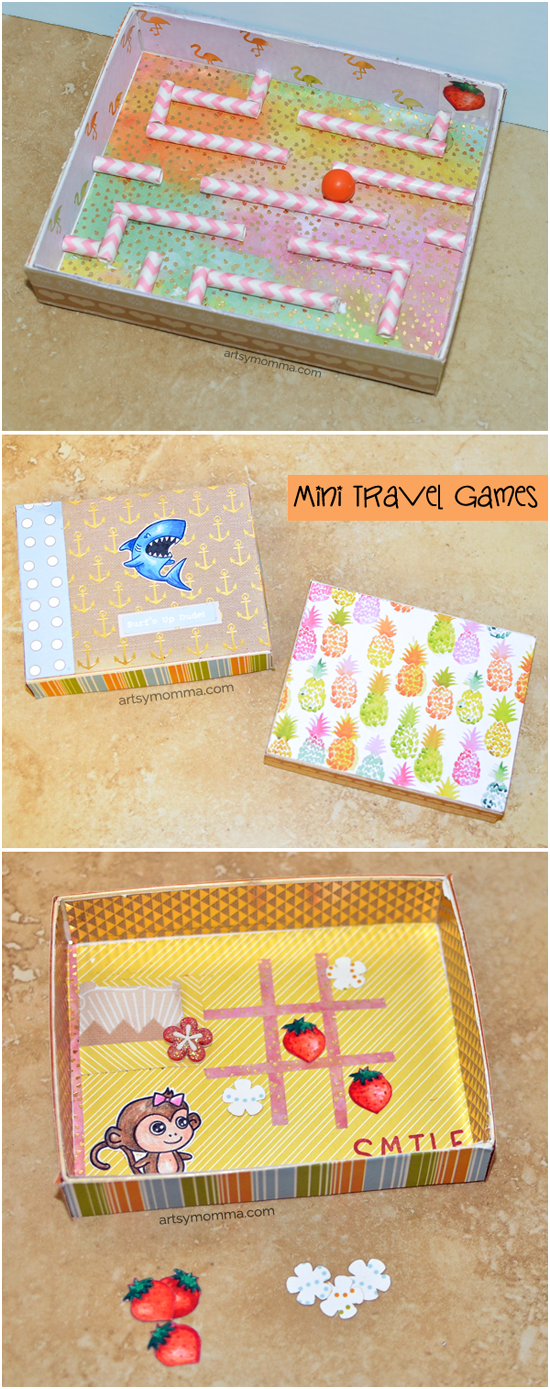
I absolutely adore all those miniature homemade games others make by recycling cardboard boxes! I decided to make my own version of a mini travel game using an empty card box. Inside is a straw maze for a marble and a tic tac toe game. It’s great to take with on road trips, plane rides, appointments, and restaurants.
*This post contains affiliate links. Additionally I received free products and compensation as part of being a Xyron Design Team member. Please read our disclosure policy here. Head over to the Xyron FB page and the Waffle Flower blog for more great projects.
How to make the Mini Travel Game
Supplies used:
- Xyron® Creative Station Lite

- Permanent Adhesive Cartridge
- Xyron 1.5 inch Sticker Maker
- Hobby Knife
- Tiger & Lily Stamp Set
- Claire Stamp Set
- Black Ink Pad
- Stamp Block
- Scissors and/or Paper Cutter
- DCWV Watercolor Paper Pack
- Colored Pencils
- Prismacolor Blender Marker
- Paper Straws
- Hot Glue Gun
- Small, Empty Box
- Marble


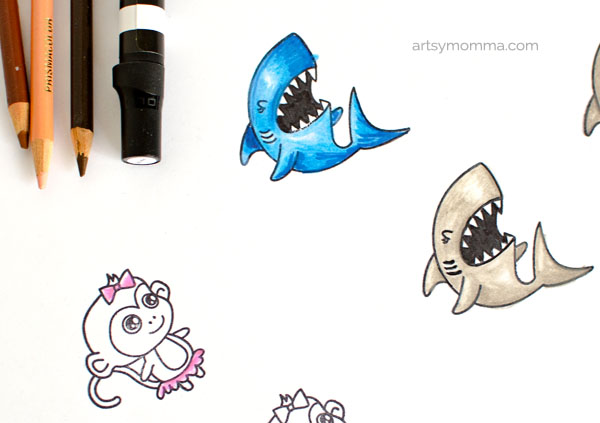
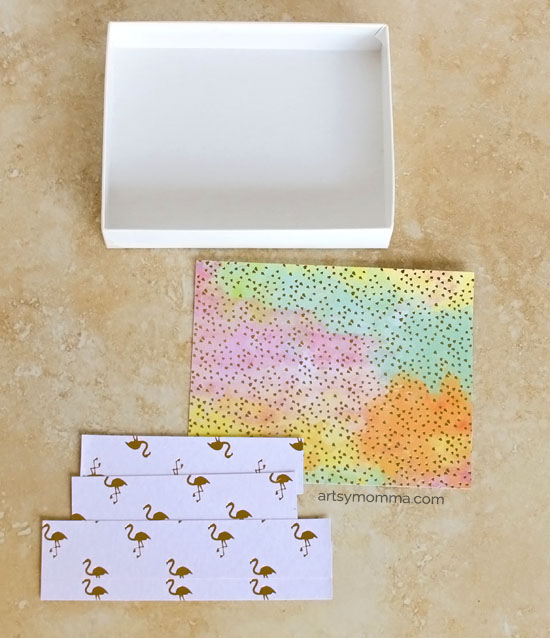
Stamp the shark, monkey, and 6 berries on cardstock. Color and blend the images. Cut around them using either a hobby knife or a small, sharp scissors. Decide on a few patterned papers/cardstock to use for covering the box and lid with, including the inside. Use the box as a guideline – trace around all of the sides on the backsides of the scrapbook paper. Here’s what I cut using a variety of pretty patterns from the DCWV Watercolor Paper Pack:
2 – large rectangles for the top and bottom of the box (outside)
2 – large rectangles (slightly smaller) in plainer patterns for inside the box and lid
8 – thin, long rectangle strips
8 – thin, small rectangle strips
After cutting the rectangles, check them to see that they fit. Adjust accordingly if they don’t. Then it’s time to put them through the Xyron Creative Station Lite!
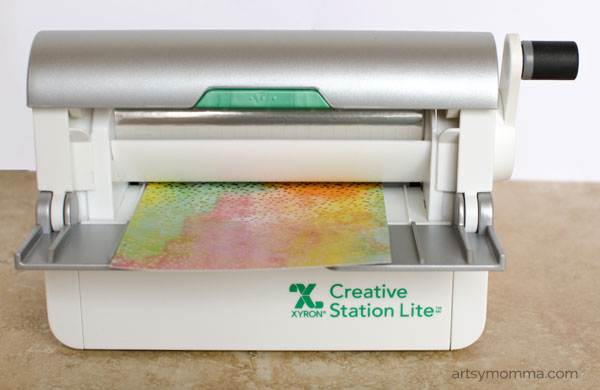
Assure that you have the permanent adhesive cartridge inside and then crank the handle.
I used the 1.5 inch sticker maker for the rectangle strips because they were the perfect size.
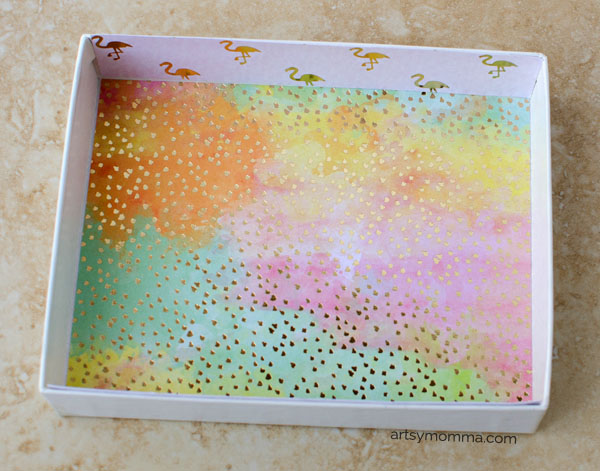
Once you have turned them all into stickers, peel them off and line all the sides – both inside and out. I used a library card to rub/press everything down really good.
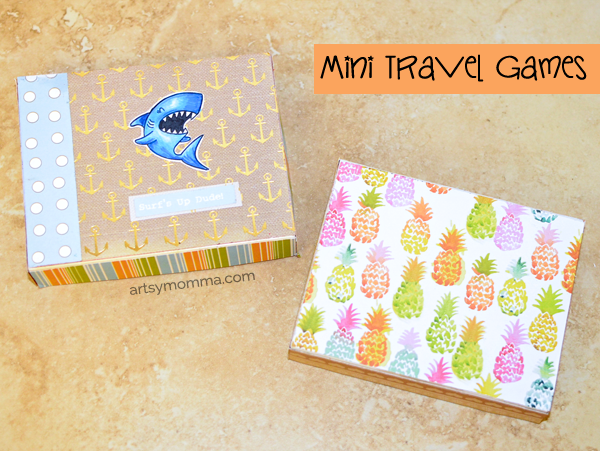
Decorate the top of the box however you’d like. I used a blue shark, a surf saying, and a couple more papers (one on the side and one under the saying) – using the same sticker method for adhering the design. I’m in love with the pineapple paper I used on the bottom!!!
Tic Tac Toe Tutorial
On the inside of the lid, I made a tic tac toe grid using sticker paper leftover from the rectangles I made earlier. The super cute monkey is off to the left with a miniature envelope above be her head. This is for storing the game pieces. In the bottom right corner I used the stamp, “Smile until your cheeks hurt” with a raspberry chalk ink pad.
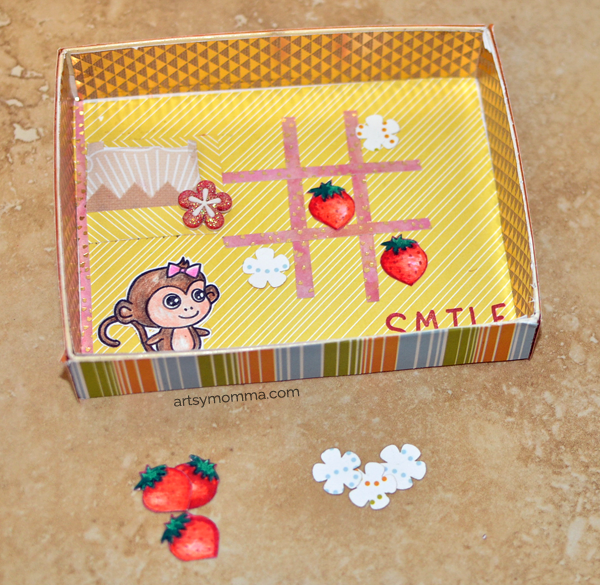
Cut the stamped strawberries to use as markers for the game. I also made 5 die cut flowers for player 2’s game pieces. You could also use coins, buttons, gems or anything else small enough to fit the squares.
Marble Box Maze Instructions
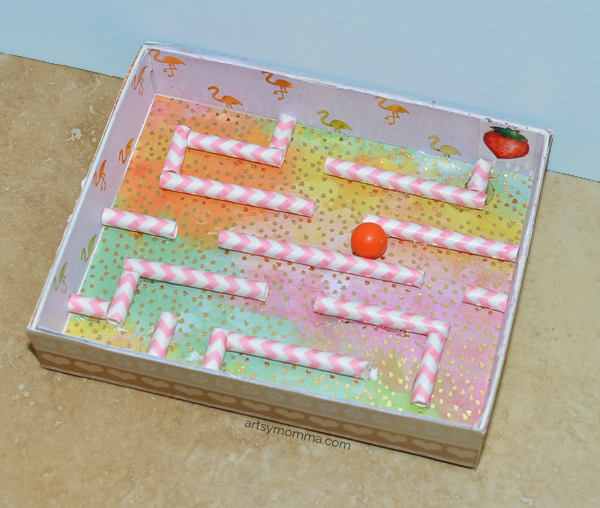
After you cover the bottom of the box and sides, it’s time to design the maze. Cut paper straws in different lengths. It’s helpful to map it out beforehand on a sheet of paper the same size as the box. Hot glue the straws to the bottom.
I added a strawberry to mark the end. To play, hold the box in your hands and tilt it to change directions. The marble has to reach the strawberry to win!
Hope you enjoyed our tutorial for making a cardboard box mini travel game! Check out this Fairy Jar/Glitter Shaker we made recently that would also be great to take along on road trips.


Couple of cute
game boxes!
Carla from Utah
Thanks you!
WOW! Thank you Amanda for this great tutorial. I have 2 little grandsons and they would LOVE this! Now I just need those stamps! LOL
Aren’t they cute? They have so many cute stamp sets making it so hard to choose.
I love seeing how you use your Xyron products! Off to enter that giveaway now 🙂
Good luck & thanks!
Such a great idea to make games like these for road trips. Wish I had had these years ago when my children were younger. Thank you for sharing!
You’re welcome and thanks for taking the time to leave a comment 🙂
Super cute & fun idea!! Love it when DIY projects are interactive 🙂
This is a great idea! Can’t wait to make some for my Granddaughter when they take their next trip.
Love your fantastic ideas – get the kids off the phones and i-pads. Thanks for sharing.