Fun Jack-o-lantern Craft with Changeable Emotions
Our creative preschool theme for this week is pumpkins. We made a fun jack-o-lantern craft with changeable emotions since Little Sister enjoys making faces. She absolutely loved that the facial expressions could be changed! It was hard for her to wait for the glue to dry completely as she kept asking if she could see all the faces. Slightly older kids might enjoy this Halloween activity too. Don’t forget to check out our creative preschool buddies post at the end of this post!

*This post contains Amazon affiliate links to the products mentioned. Please read our full disclosure policy here.
How to make the Jack-o-lantern Craft
Supplies needed:
- 2 paper towel tubes (tp tubes would work too)
- printable emojis
- orange paint (we used metallic orange paint which look shimmery!)
- crayons or other coloring materials.
- scissors
- packaging tape
 (the kind used for boxes)
 - glue
- orange tissue paper
- 4 green pom poms
- 4 small cardboard squares
 (the kind used for boxes)

Instructions:
Paint 2 paper towel rolls with orange paint – as many coats as needed. Let dry.
Print the emoji template found on Momendevars. Color with orange and cut around each on the inside so that the black outline gets cut off.
While Little Sister colored the faces, I cut the cardboard tubes into smaller sections. To size it, place one of the faces on the tube. You will want to cut it so there is some space above and below it. Use that one as a template to cut 7 more.
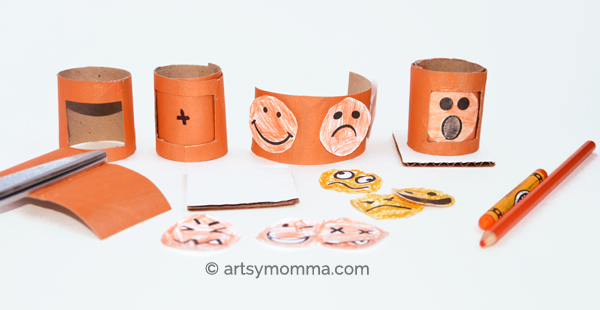
With 4 of the mini tubes, cut a slit in each so it opens up flat. Cut a small strip off one end. These will be used later for inside the other 4 tubes.
With the remaining 4 tubes, cut a square window in each equal to the size of the emoji. To assure that the faces align with the window correctly, place the cut cardboard tubes inside the ones with the square windows. Make an ‘x’ in the center of each window. This will be the guide for placing on the emojis. Place 3 emojis on each with glue using the ‘x’ to guide where the center of the circle should be.
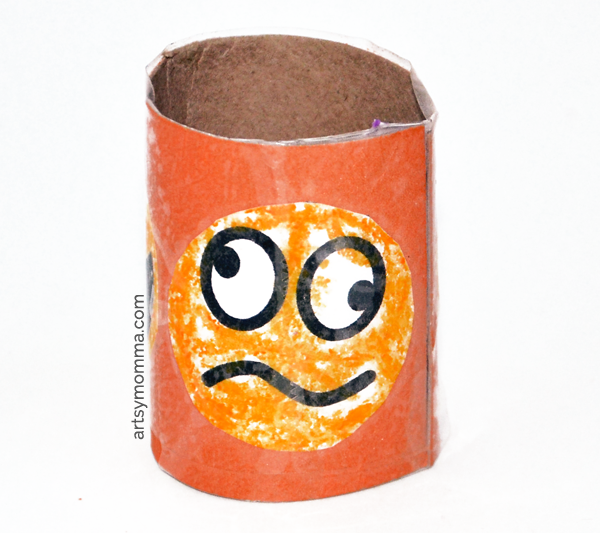
Take the box tape and tape over the emojis leaving a small overhang. Use the overhang to tape to the other end creating a tube. Covering with tape helps the faces stay in place so they don’t rip off while turning them.
Glue the tube with the emojis to the cardboard squares. Let dry for a long time (or used a hot glue gun). Once completely dry, stuff tissue paper inside. Glue a green pom pom to the top. Add the window tubes over them. Twist them to change the emotions!
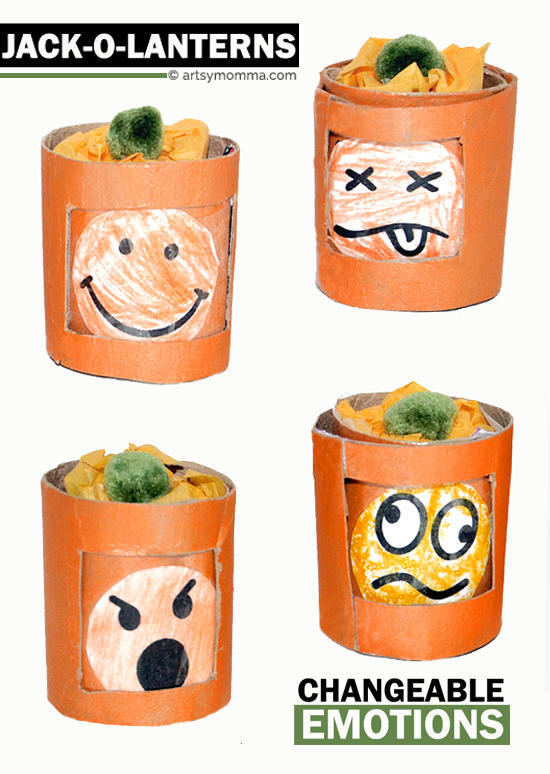
This turned out to be such a fun activity for Little Sister that we may make it again with a different theme! After talking about what each emotions stood for, she practiced making the emotion herself. It was too cute watching her try to wink!
Creative Preschoolers Pumpkin Theme
- Pumpkin Candy Preschool Math Printable| I Heart Crafty Things
- Twist and Mix: Color Mixing Pumpkin | Hand Made Kids Art
- Upper & Lowercase Alphabet Puzzles | School Time Snippets
- Glittery and Googly No-Carve Pumpkins | Pink Stripey Socks
- Pumpkin Face Playdough Game | A Little Pinch of Perfect
Last week’s theme was corn. Our next preschool theme is MONSTERS – yay! We love monsters and are super excited to see what everyone creates.
What an adorable idea!!
OMG these are so cute and clever!!!
Thanks! Emji anything is a big hit in our home 😉 🙂
I love the interactive element of this craft. So fun!
Thanks! She puts them all on Happy faces 😀