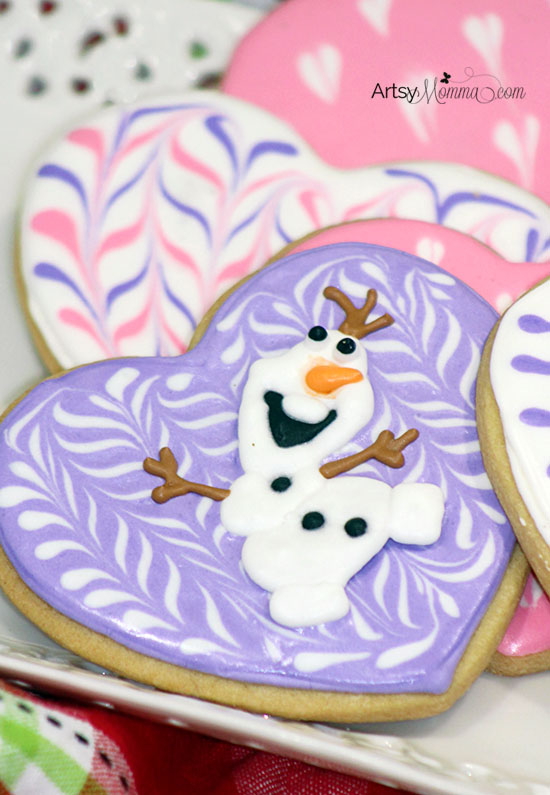
DIY Olaf Valentine’s Day Cookies
Valentine’s Day is the sweetest holiday and wouldn’t be complete without a sweet treat like these Olaf Valentine’s Day cookies! Make heart-shaped cookies with marbled frosting and get a tutorial for creating your very own iced Olaf cookie toppers.

How to make the Olaf Valentine’s Day Cookies
Cookie Ingredients:
- 5 cups flour
- 2 teaspoons baking powder
- 1 teaspoon salt
- 1 1/2 cups unsalted butter; soft
- 2 cups granulated sugar
- 4 eggs
Icing Ingredients:
- 2 egg whites
- 1-2 cups powdered sugar
- 1/2 teaspoon cream of tartar
- gel food coloring; pink, purple, black, brown, orange
You’ll also need:
*As an Amazon associate I earn from qualifying purchases.

Cookie Directions:
- Cream the soft butter with the sugar until the combination is smooth, not grainy, in a mixing bowl.
- Add all 4 eggs at one time and continue to mix.
- Mix in the vanilla.
- Sift the four, baking powder, and salt together.
- Add the dry mixture to the wet mixture. Continue mixing to make sure all ingredients are thoroughly blended.
- Shape the dough into a ball and then wrap it in plastic/ling wrap (so the entire dough ball is covered).
- Put in the refrigerator for about 6 hours or overnight. Check to see if the dough is firm.
- Preheat oven to 325 degrees.
- Pull the cookie dough out of the refrigerator and let it sit out to soften up a bit.
- Sprinkle flour over the cutting board. Rub flour on the rolling pin and work some flour into
the batter (if needed). - Roll the dough out on the cutting board. Then use the heart-shaped cookie cutter to make your cookies.
- Line the cookie sheet with parchment paper. Use a metal spatula to move the cut cookies to the lined cookie sheet.
- Bake at 325 degrees for 8 minutes. Check to see if the cookies are thoroughly baked.
- Place the heart-shaped cookies on a wire rack to cool completely.
(About 10 minutes).
Icing Directions:
Please refer to this cookie decorating tutorial. You may need to add water to some of the frosting, a tiny splash at a time until you get a good consistency. After following The Barefoot Baker’s tutorial, then follow these steps:
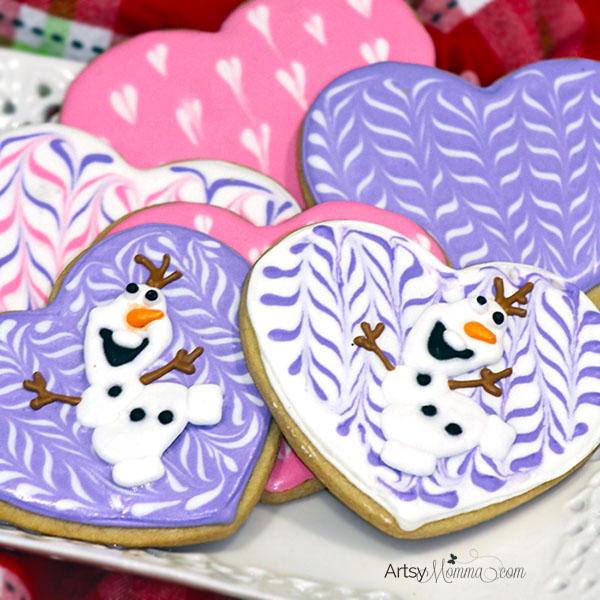
- While icing is still wet on the cookie, use the thicker, white icing to make solid lines going horizontal. (pictured below). Once done, pull a toothpick through the lines making arrow-like designs.
- To make the little hearts: while the icing is still wet on the [pink] cookie, take the thick [white] icing and make polka dots. Using a toothpick, pull through each dot to make it look like a heart.

How to make the Olaf Cookie Topper
- Find a picture of Olaf and size it in Microsoft Word (or similar) so it’s about 2 inches in height by 3 inches in width. Copy and paste so you have a bunch all on one page. Save and print.
- Place the printed paper on a cookie sheet. Cover it with a larger sheet of wax paper or parchment paper (place over Olaf print outs).
- Use the black royal icing in a piping bag with a #2 tip to draw on the eyes, mouth, and buttons.
- Fill in Olaf’s body using the white icing.
- Once done will all the white and black icing, use the brown icing with a #1 tip to create the arms and hair.
- When the white is dry, use a #2 tip with orange icing to create the nose.
- Let them sit on the cookie sheet for 8 hours.
- Finish by peeling them off the wax paper and placing them onto the cookies using a white dot of icing on the back of Olaf as a glue.
These Olaf Valentine’s Day cookies are not only cute for Valentine’s Day, but they also would pair perfectly with this Frozen birthday party Olaf cookie tutorial.
More Valentine’s Day Ideas
[ess_grid alias=”Valentine Crafts”][/ess_grid]