Fun Family Activity: Head outdoors to create t-shirts!
*This is a sponsored post written by me on behalf of Huggies®. As always, all opinions are my own. Please read my full disclosure policy here.
Labor Day is right around the corner which also marks the end of Summer and time to head back to school for a lot of kids. Some parents will even have off from work over the holiday weekend making it the last chance to have a fun-filled family weekend together during the summertime. So grab some t-shirts, permanent markers, stamps, and Huggies® Wipes and head outdoors to create DIY t-shirt crafts together!

DIY T-shirt Crafts
How to make Tie Dye Sharpie Shirts
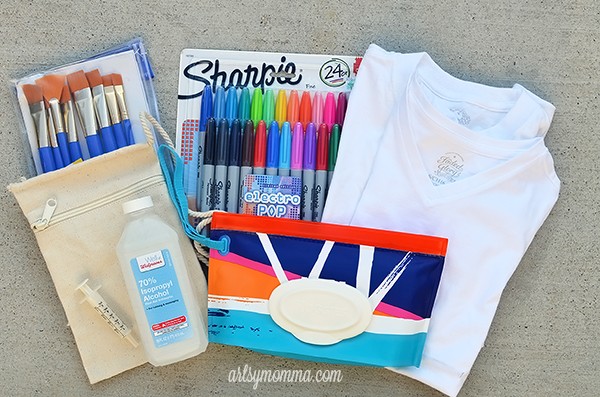
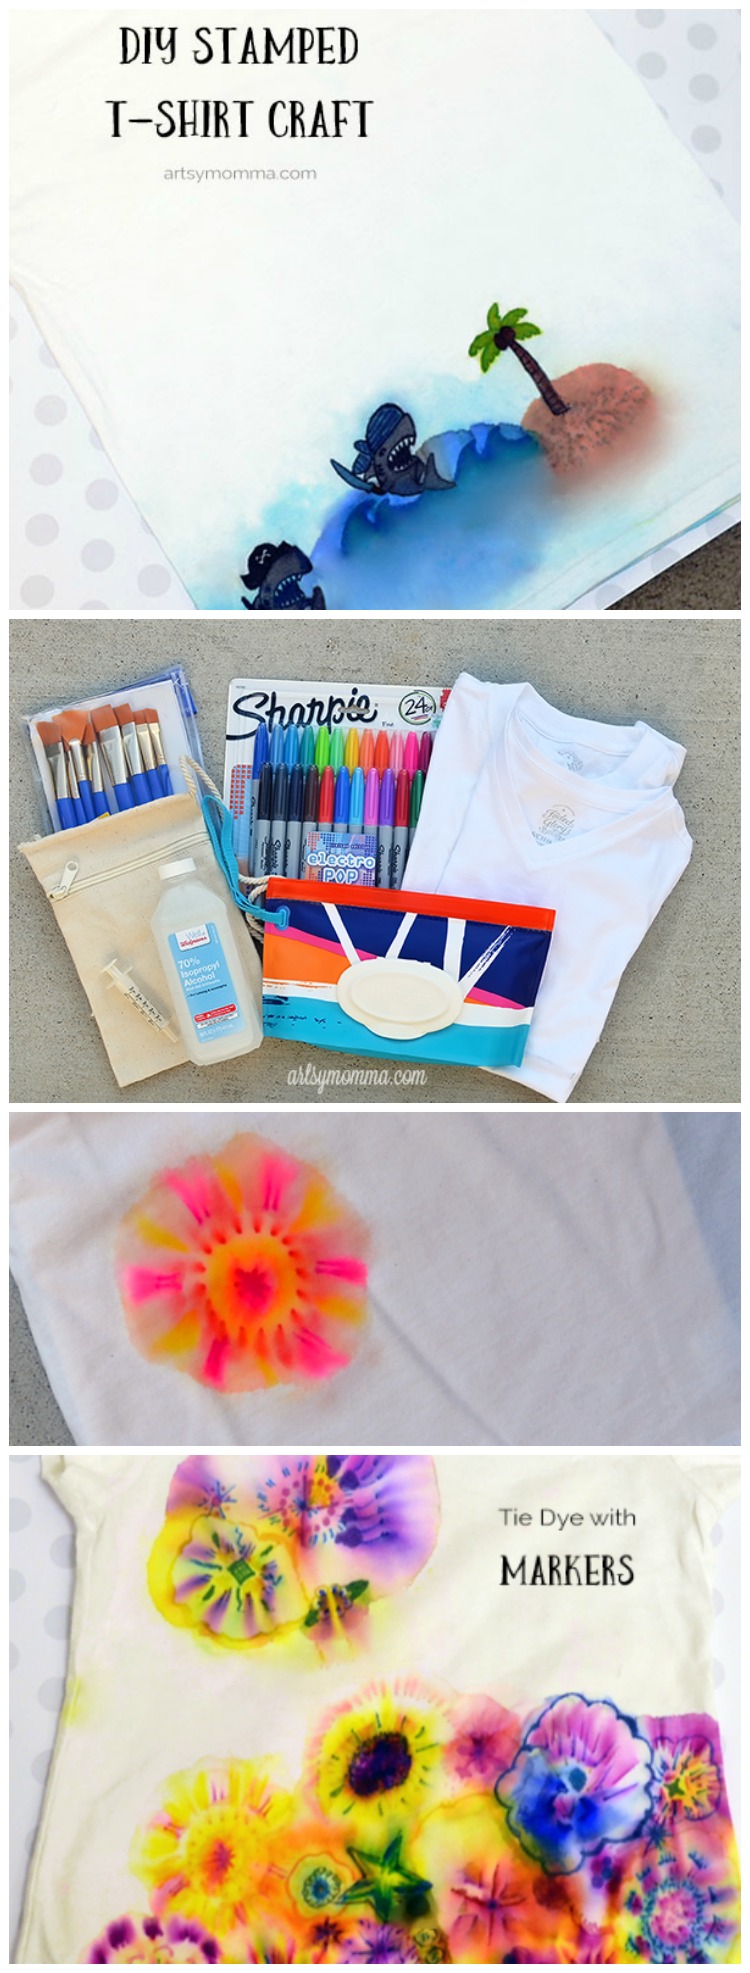
Supplies:
- plain, white t-shirts, bandanas, and/or plain canvas accessories such as the purse shown in photo
- rubbing alcohol *important* to be used under adult supervision
- permanent markers such as Sharpies
- HUGGIES® Wipes
- paintbrushes and/or medicine dropper
- cookie sheet
Instructions:
Little Sister and I spent some mommy and me time making a Sharpie t-shirt together. She starts kindergarten soon and I will miss these crafty moments with her. As prep, I set out a cookie sheet, rubbing alcohol in a shallow dish, medicine dropper, paintbrushes, HUGGIES® Natural Care Clutch ‘n’ Clean Baby Wipes, and permanent markers outside on the front porch.

FIRST – make sure to place cardboard in between the shirt.
If you forget to do this part, the markers will leak through to the back of the shirt. Once you have that in place, it’s time to make designs! Simple designs work best. Little Sister tried to copy a few ideas we found online. She also asked me to draw a star for her to fill in.
After the designs are finished, take out the cardboard and place a cookie sheet inside instead. This will catch the colored rubbing alcohol.
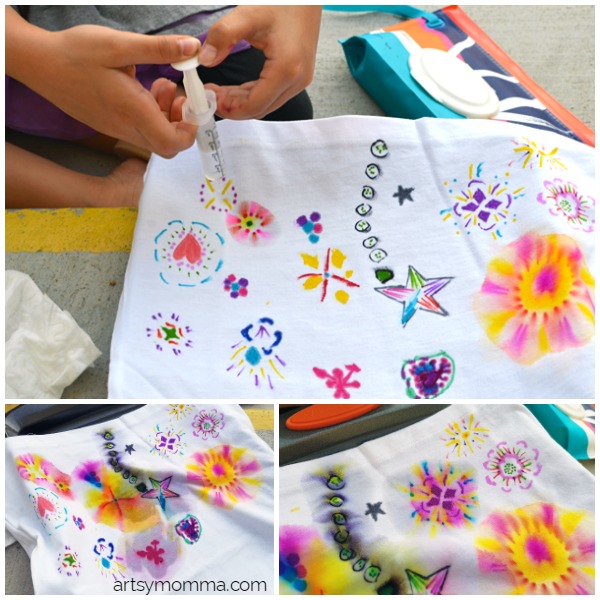
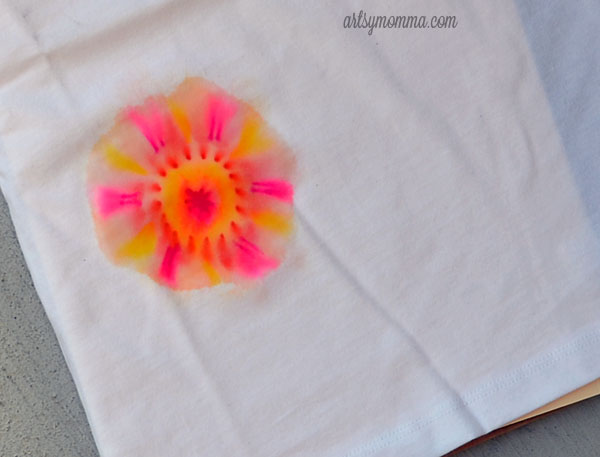
Little Sister filled up the medicine dropper with rubbing alcohol and squeezed drops of it over one of the designs. She also tried using a paintbrush dipped in the rubbing alcohol. Both ways work.
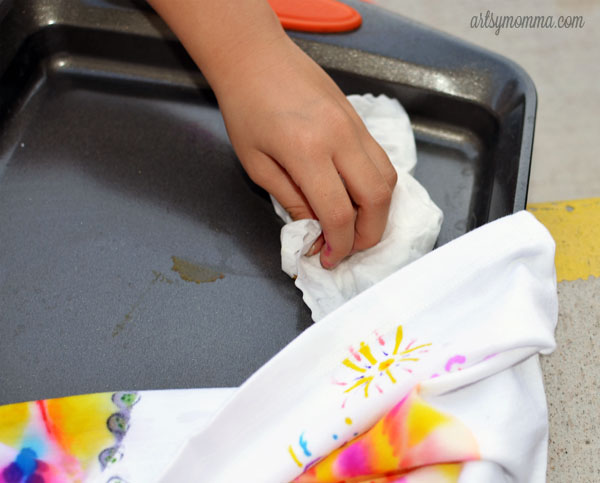
After she finished a section, she lifted the shirt and pushed it aside (refer to above photo) and used the Huggies® wipes to quickly and easily clean up the colored rubbing alcohol that dripped through. She repeated this method until all of designs were finished.

It’s neat to watch the colors spread out and blend together into a watercolor look! Like magic … hehe.
See this process in action here (link coming)!

Let it air dry outside since the smell is quite strong. It’s also worth noting that this project in general is best done outside or in a really well ventilated area.
DIY Stamped T-shirt Tutorial
For this project you will also need stamps, ink, and a stamp block.

Make prints on the shirt and let dry. Big Brother used both ink and markers on the stamps to make the prints. Then, just wipe it clean with the Huggies® Wipes.
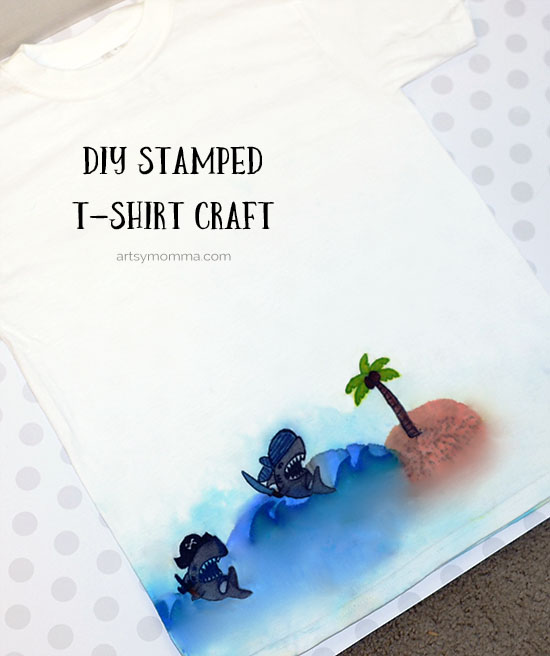
Color in the prints with permanent markers or fabric markers.
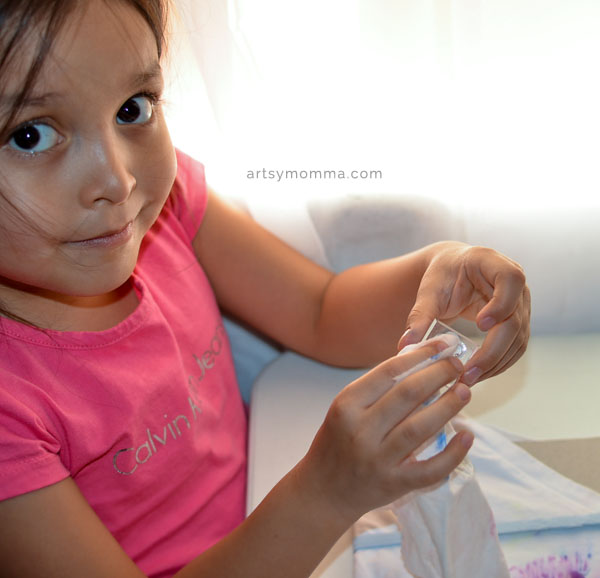
After seeing Big Brother’s stamped shirt, Little Sister wanted to stamp hers too. After washing her shirt in the washer and dryer, I add some small details with ink and then brought out the stamps for her to use. She picked butterflies and flowers.
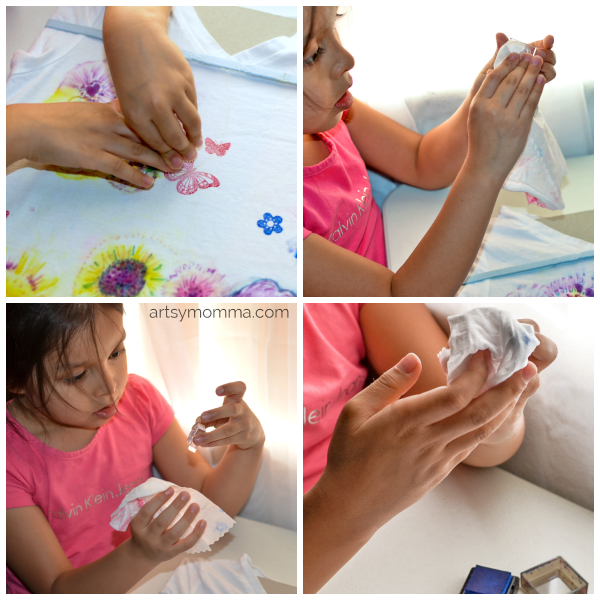
The stamps easily cleaned up with Huggies® Wipes plus Little Sister was able to clean the ink on her fingers between colors.
Whether you are getting in one last outdoor family activity over Labor Day weekend or looking for a fun boredom buster to keep the kids busy, these DIY t-shirt crafts are sure to be a hit.
See more ideas for clean fun when you join the #HugTheMessSweepstakes with Huggies® on Twitter and Instagram!
Love this! I’ve done something similar on canvas shoes. I got loads of compliments on them.
Also this is great for gifts to elders. I’d love something like this from grandchildren or great-grands. I have 11 grands and 3 great-grands.