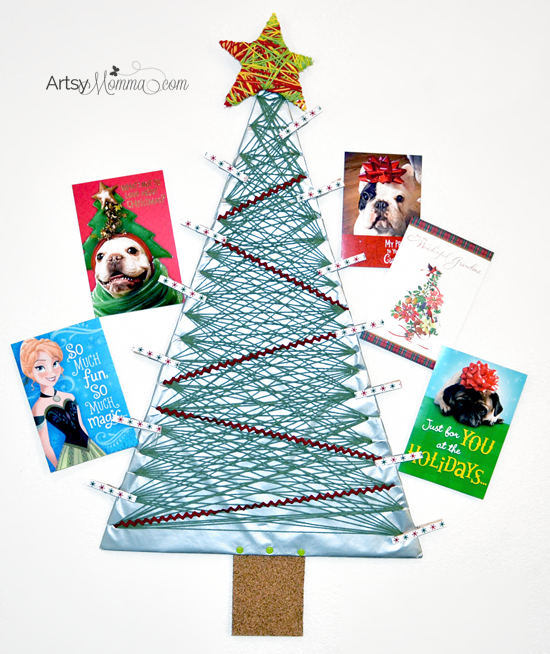
DIY Yarn Wrapped Christmas Tree Card Holder
This shop has been compensated by Collective Bias, Inc. and its advertiser. All opinions are mine alone. #SendHallmark #CollectiveBias
Have you sent your Christmas cards yet? When I think of Christmas cards, Hallmark comes to mind. This year we purchased our Hallmark greeting cards at Walmart (and maybe this year I will get them sent out not super last minute….haha!).

With technology in overdrive nowadays, it’s so heart-warming to receive a Christmas card in the mail that was chosen specifically for you with the hopes to send some holiday cheer your way. Mailing Christmas cards is something I have always enjoyed doing. I hope to keep this tradition for many years and share it with my children who already love picking out the perfect card to give someone they care about.
Our Christmas card holder broke and after not finding a new one I liked, I opted for making my own. There is also a string art and yarn wrapped everything phase currently and seems to be all over Pinterest. I thought this would be the perfect opportunity to give it a try (it’s addicting BTW!). Incase you wanted to make your own, I’m sharing our tutorial for making your very own Yarn Wrapped Christmas Tree Card Holder.
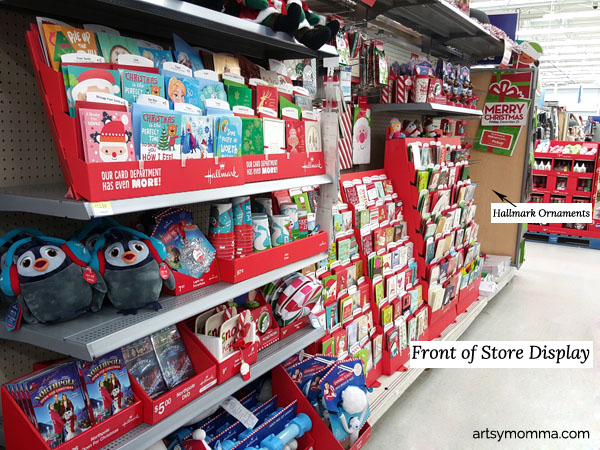
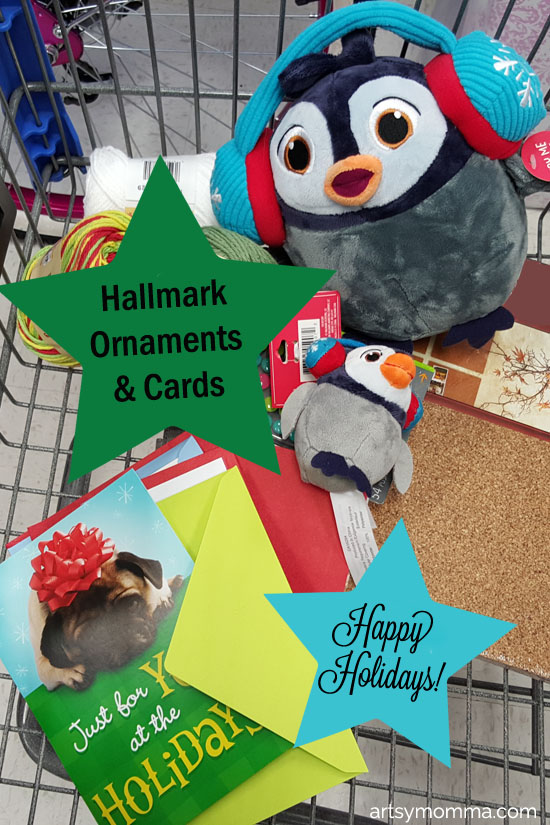
The Hallmark greeting cards and ornaments were featured in the front of the store in a special display (also in the card section for more).
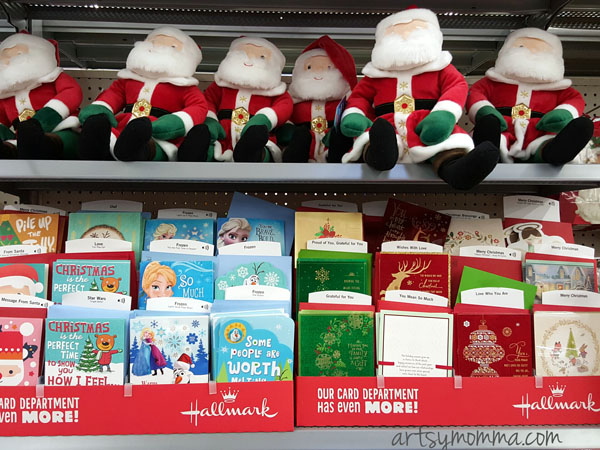
Both my little ones are obsessed with penguins. Hallmark had the cutest ever Jazz the Penguin Ornament and a matching stuffed animal (the stuffed animal says/sings the cutest sayings). While picking out our cards they insisted that they HAD to have them. They were so adorable that I couldn’t say no. The Hallmark ornament is fun year round beside hanging on the tree.

How to make the Yarn Wrapped Christmas Tree Card Holder
We purchased most of our supplies at Walmart while shopping for our Hallmark cards to send to family.
Supplies Needed:
- foam board (office supplies section) or large piece of cardboard
- wrapping paper
- yarn (craft section)
- scissors
- craft knife
- hot glue gun
- Christmas-y ribbon; we also used ric-rac.
- clothespins (kids craft section)
- duct tape
- cork board (office supplies section)
- decorative thumb tacks (by cork board)
Prep:
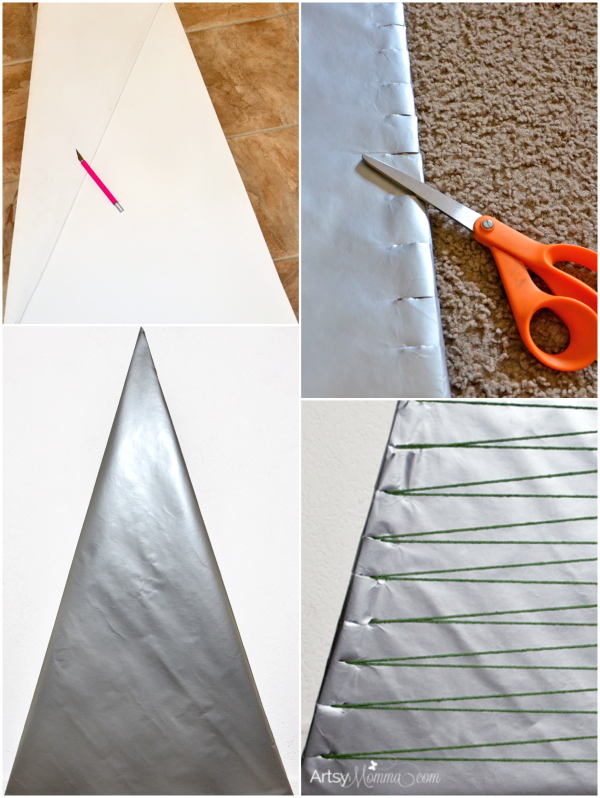
Place the foam board in a vertical position. Mark the center point along the top edge.
Take another foam board or a long ruler to use as a straight edge. Place on a diagonal starting at the center mark you made and ending in the bottom corner of one side. Use a craft knife to run along the edge (the entire length. Flip the board over and gently fold the cut part. Run the craft knife along it while holding in a slightly bent position. Separate the 2 pieces.
Repeat with the opposite side. Use wrapping paper to cover the tree shape. We used a plain silver wrapping paper. Alternatively, you could use spray adhesive with fabric.
Cut 1-inch slits along both edges evenly spaced on a slight downward angle. We ended up with 20 slits on each side.
Instructions:
1. Insert the end of the yarn into the bottom-left slit with the tail being on the back side.
2. Pull the yarn straight across to the right side. Wrap around the back to the 2nd slit on the left side. Pull straight across to the right-side. Repeat these steps until you have gone through all 40 slits.
3. You should now be at the top-right of the tree. Pull the yarn on an angle and insert in the next slit on the left-side. Wrap the yarn straight across on the back and pull through the slit. Keep doing until you have reached the bottom.
4. Repeat this same process on other side. This time you will instead be starting on the bottom-left and pulling on an upward angle. Stop when you get to the top.
5. This time, wrap the yarn on an angle skipping a slit. Wrap it straight across on the back side. Repeat all the way working your way down and then back up again.
6. When you get to the end, repeat this same process with every third slit.
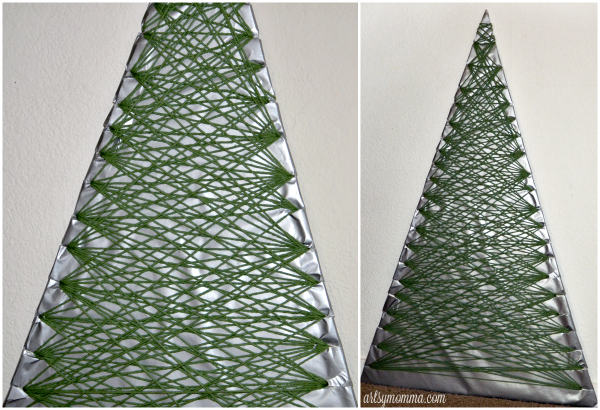
7. Keep wrapping on angles skipping slits so that your are always making a new line – never going over one you previously made. (this part will take a little bit of time). As an example, if you look at an individual slit on our Christmas card holder, it has between 9 and 12 different angled yarn lines coming out from it. We ended up using all our yarn.
8. I happened to have red ric-rac on hand which I wrapped around the tree in a zig-zag.
9. Flip over and secure the yarn in a few places with duct tape (back side).
10 Warm up the hot glue gun.
10. Grab 13 clothespins (or however many you wish to use). Also grab a Christmas patterned ribbon equal to the width of the clothespin. Place along one side to measure. Cut at the edge. Your ribbon should now be the same length as the clothespins. Use this ribbon to size the rest.
11. Add a strip of hot glue on the top of a clothespin. Place the ribbon over it. Repeat with the remaining clothespins.
12. Place the clothespins along the edges of the tree in an upward angle – the end that you pinch together. The part that grasps should be on the outside ready to grab the Christmas cards. Ours has one at every third slit – 7 on one side and 6 on the other side.
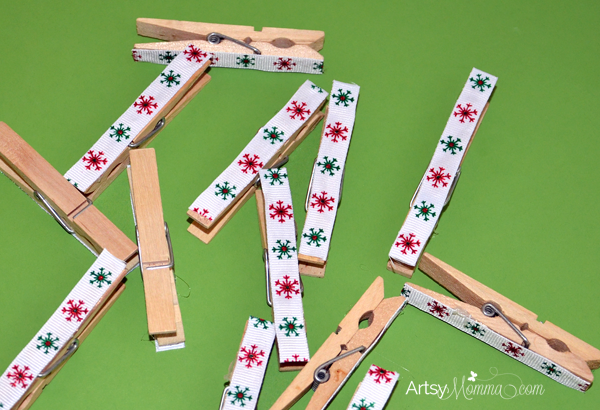
13. Secure the clothespins in place on the back of the tree with duct tape.
14. Cut a small rectangle from one of the cork board sheets. Use the decorative thumb tack to hang it from the bottom of the tree. I also added duct tape on the back to assure it wouldn’t fall off.

15. Cut a star shape from the craft foam board you used during the prep. Wrap it with yarn in all different directions until it is covered. Place at the top of the tree and wrap the 2 together. Secure any loose strands with tape.
16. Hang on the wall! Yay! Ours has a nail at the top and just above the tree stump.
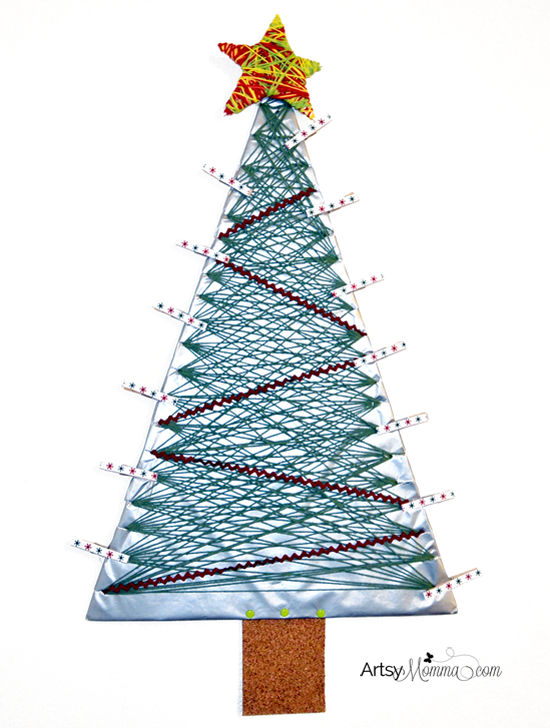
17. Add the cards you receive to the clothespins.
You can also pin or hang stuff to the cork tree trunk and place photo cards in the wrapped yarn. While making the craft, kids can join in on wrapping the yarn or even making the yarn wrapped star all by themselves.
- Click here to save $1.00 off of a two Hallmark Greeting Card purchase at Walmart, minimum $1.00 purchase required. Take advantage of the savings and #SendHallmark this holiday season!
Are you inspired to make your own Yarn Wrapped Christmas Tree Card Holder? Would you make something different? Let us know in the comments!
See more holiday card and ornament ideas in this gallery!


What a fun idea! Simple to put together (mostly) and I LOVE AND NEED THOSE PENGUINS! Your tutorial is fantastic and I could DEFINITELY use something like this for our cards this year! #client
Thanks Samantha! I ADORE the penguins ♥
Simple, cute and creative! Love!
Thanks Meeghan!
Awesome post! I love the craft and the penguin! 😀
TY! It was fun to make!