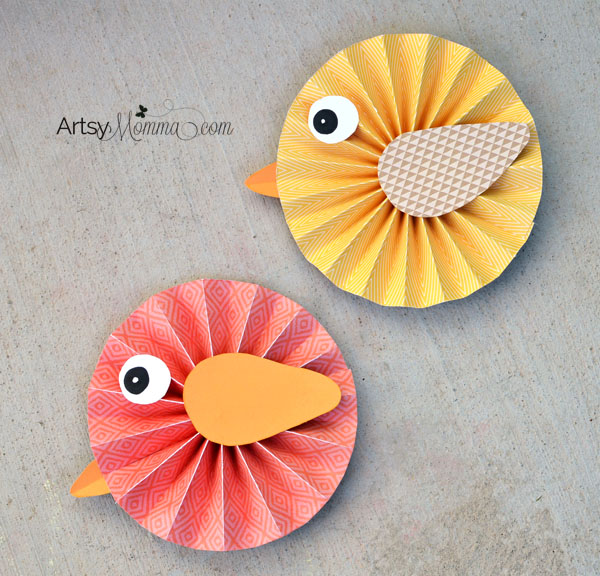
How to make Paper Rosette Birds
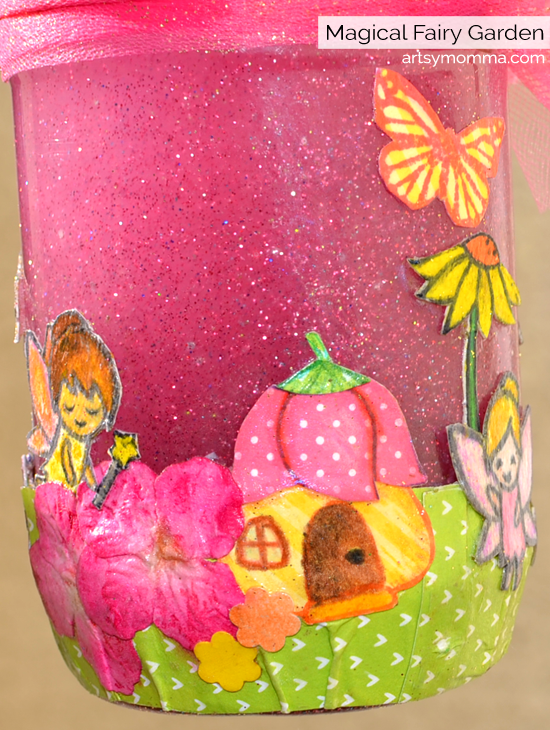
Spring has sprung in my neck of the woods, so we are in full Spring crafting mode. Today’s post is actually 2 parts due to length. In this post, we are sharing a tutorial for cheerful paper rosette birds. In post 2 we will show you how to easily incorporate the rosette birds into a pretty spring vase decoration that could also be used as a table centerpiece.
*This post contains Amazon affiliate links to the products mentioned. I am also part of the Xyron Design Team and was sent the DCWV Projects Stacks free. Please read our full disclosure policy here.
Supplies Used:
- Xyron® Tape Runner
- Xyron® 3″ Sticker Maker
- DCWV® DIY Project Stack Mini Albums
- Scissors
- Duct Tape or Hot Glue
- Black Marker
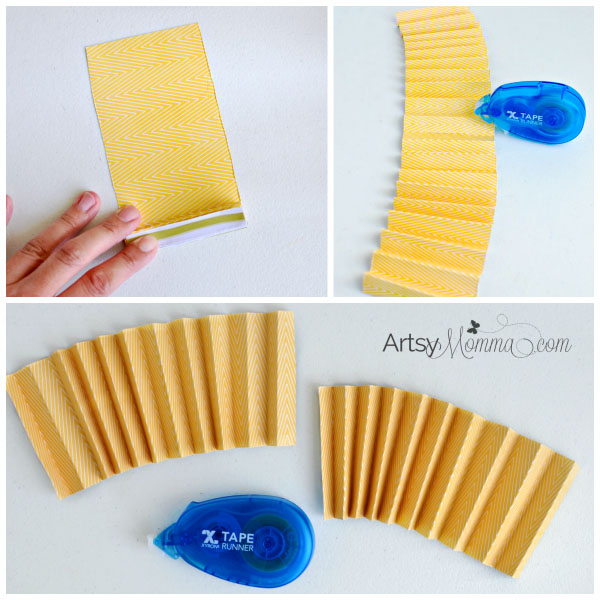
1. Cut a 12 x 12 sheet of cardstock in half. Cut in half again so you have 3 x 12 inch strips. You will need 2 strips for each bird.
2. Make accordion-style folds using the entire strips. It’s easier to make score marks beforehand. See what I mean here. I just used the tip of our scissors and a straight edge.
3. Once you have both strips folded, use the Xyron tape runner to stick 2 of the ends together.
Repeat this process with however many birds you’d like to make.
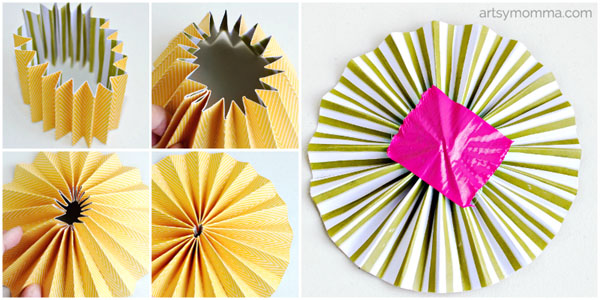
4. Adhere the remaining 2 ends together sorming a jagged-looking circle shape (see 1st photo in collage).
5. Cup your hands around it and push down until it is flat. You can either use hot glue in the center to make it stick or slap a piece of duct tape on the backside. I also added a bit of glue inside the hole once I turned it over. It should now look like a circle.
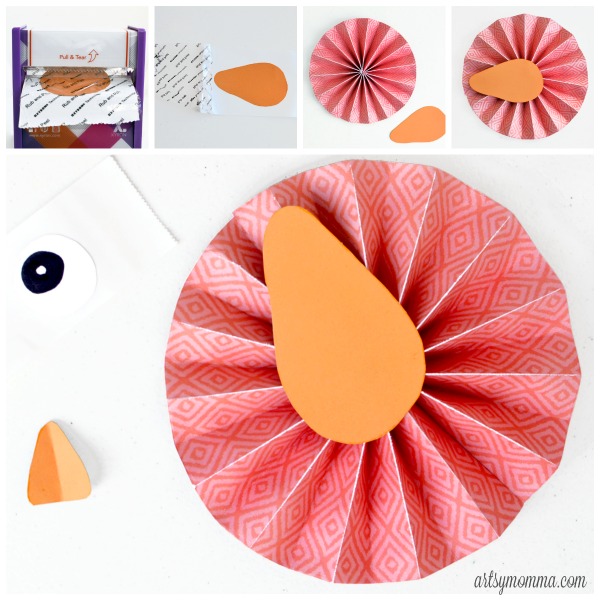
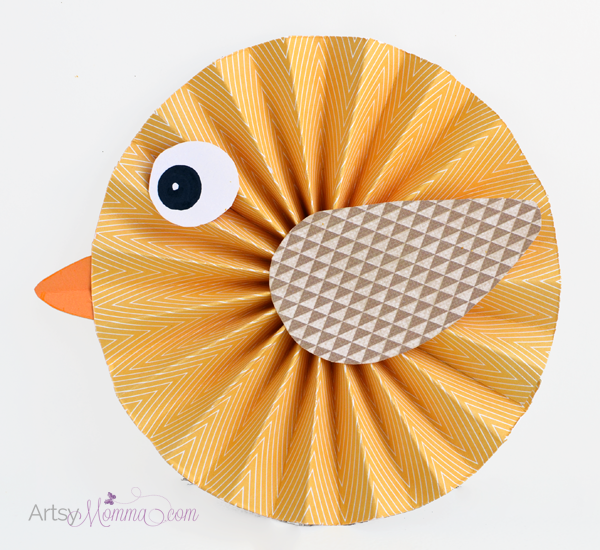
6. Cut a bird wing shape from cardstock as well as a beak and white part of the eye.
7. Fold the beak in half and color in the black part of the eye.
8. Send your bird wings through the Xyron® Sticker Maker. If you’ve never used one, it’s so awesome! You just place the wing in one end and pull the other end until it’s completely through (1 photo in collage). Peel back the plastic (2nd photo) and then peel off the wing. You now have your very own sticker. Cool, huh? I’m officially addicted to ours!
9. Stick the wing on to the center of the folded circle.
10. Use the tape runner to add the eye and nose. Line up the fold in the beak with one of the accordion folds.
→ See more Xyron products here and DCWV products here.
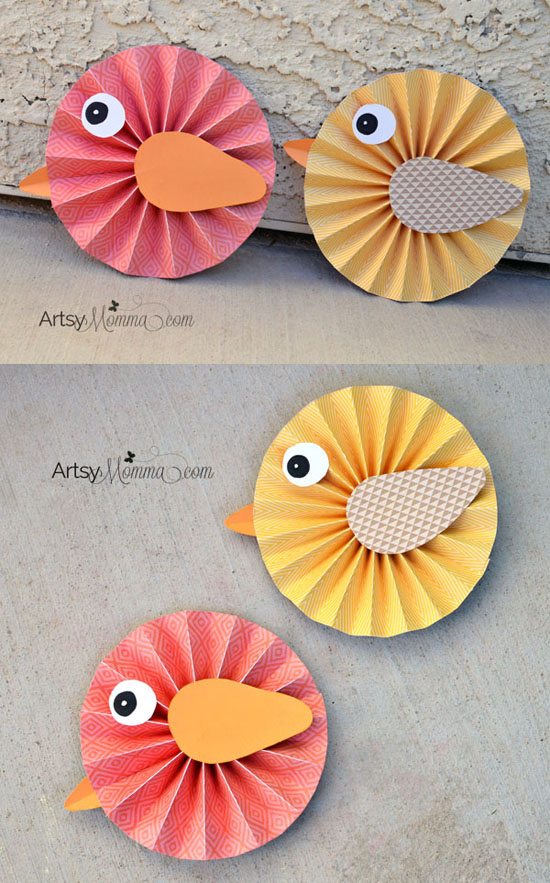
Aren’t they lovely? You could hang them up on the wall, use them in a banner or even place them on a gift bag. Be sure to come back this weekend to see part of how we used the paper rosette birds to create a Spring decoration for our half wall counter!
[ess_grid alias=”Easter Spring Grid”][/ess_grid]


These are so adorable!!!
Made a garland of the birds to hang in my art/stained glass studio. They would look especially cute in a nursery or little girls bedroom.
That sounds so pretty <3