Diamond Press Review and Crafty Bookmarks
Have you been following along with our recent DIY Projects? Today I’m sharing another awesome new product with you (sent to us free for review purposes), the Diamond Press by Crafter’s Companion. Because we think this crafting product is so fun, we are also hosting a giveaway along with a tutorial for making crafty bookmarks!
Head over to our Instagram account to see how to enter – it’s easy!
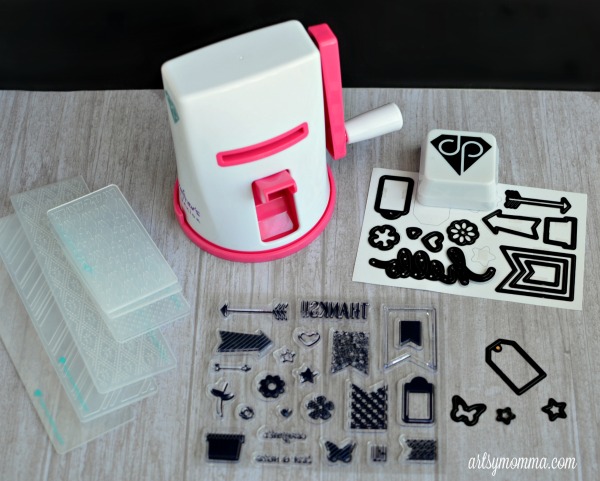
Besides the Diamond Press and accessories in the photo, we are also bundling it with a Mega Runner and 1.5 inch Sticker Maker from Xyron. One winner will receive all three craft products!
About the Diamond Press:
The Diamond Press features an assortment of dies and embossing patterns/textures, as well as stamps and ink pads. It also works well with other brand dies, making your creative possibilities endless. In other words, do more with 2″ than ever before.
How to make the Crafty Bookmarks:
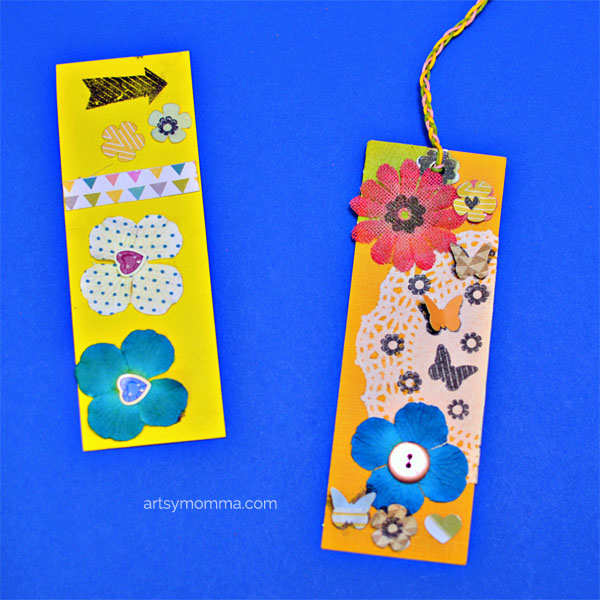
Cut rectangle shapes from cardstock. Ours are about 2 inches by 6 inches. I folded a 12 x 12 cardstock in half and marked off sections that way. It really could be however wide you’d like.
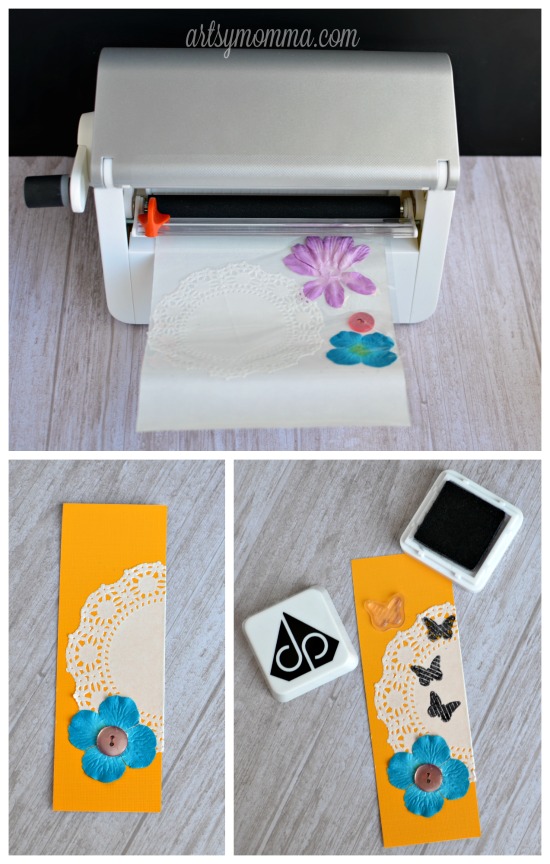
Place a doily through the Xyron® Creative Station Lite. Adhere it to the bookmark; folding the part that hangs over around to the back side. Send flower embellishments and buttons through the Creative Station as well.
Stamp butterflies and flowers using the ink and stamps included with the Diamond Press.
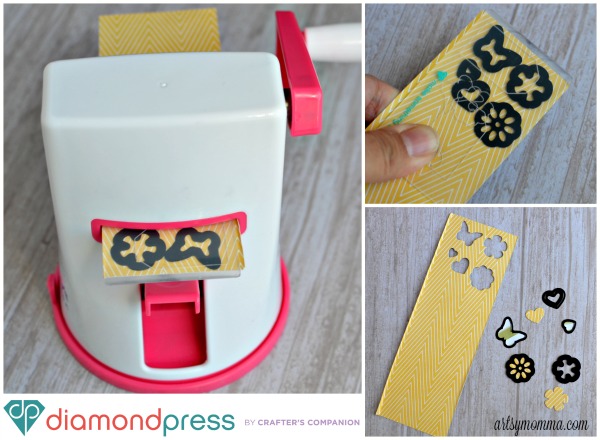
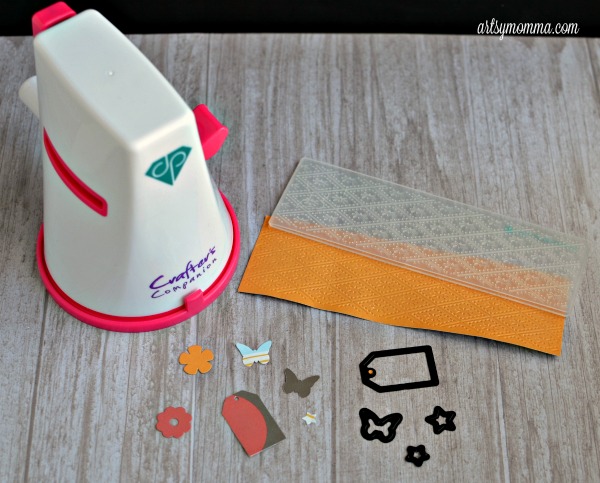
Cut a bunch of butterflies, flowers, hearts, etc. using the die cuts. We placed one of each inside the die cut folders with the sharp side down on the cardstock. It will be sandwiched in between the plastic. Place the Diamond Press on a table and press the lever to suction it in place. Send the plastic folder through by inserting it into the slit and turning the handle. So simple, love it!
Press out the cardstock that is stuck inside the die cut. Use a hobby knife or another object with a tiny point to poke through the holes on the back to help push it out. Stick the bookmark on using a Tape Runner or glue. For this one, I left the butterfly wings in the up position to give it a 3D look. Embellish with more flowers, cut-outs and stamped prints.
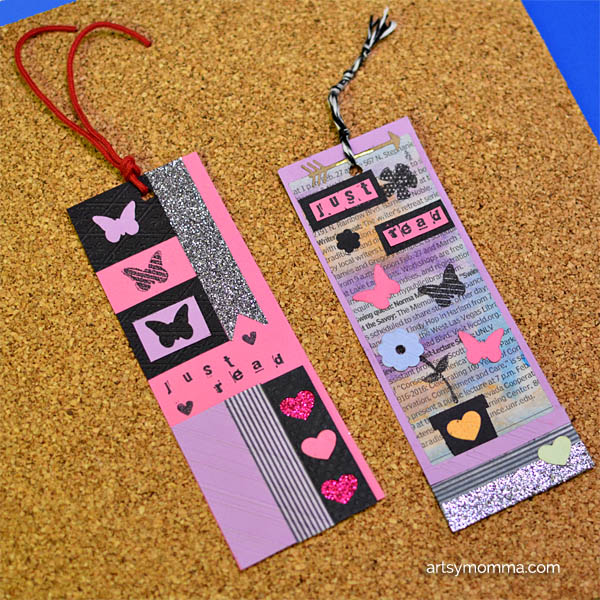
For these two crafty bookmarks, you’ll need washi tape, cardstock, mini alphabet stamps, newspaper, watercolors, and a Xyron Sticker Maker. For die cuts we used the butterfly, heart, arrow, flowerpot and flower. From the stamps, I used the tiny heart, stem, butterfly and flower.
I thought it would be neat to add a watercolor background. It’s just watercolor painted on top of newspaper.
Use the die cuts with different colors. Don’t forget that you can also use the part the piece was punched out from (example: on the pink bookmark, the top purple butterfly was punched out from the purple piece a little below it). We also embossed the purple and black cardstock with 3 of the embossing folders. I like how professional it makes it look!
Arrange the items until you get a design that you are happy with. Use your sticker maker to stick everything in place. Stamp the phrase, “Just Read” and add the rest of the stamped prints.
Use a hole punch to make a hole at the top of the bookmarks. Use threading cord or similar to add the string at the that comes out of the hole at the top. You may also wish to use braiding cord, add beads or any other cool idea you think of.

For easy crafting, here are affiliate links to many of the products we used to make these crafty bookmarks:
(*Please read our full disclosure policy here.)
Diamond Press by Crafter’s Companion
Xyron Creative Station Lite
Xyron 1.5 inch Sticker Maker
Tape Runner
Watercolors
Glitter tape
Washi Tape
Scrapbook Flower Embellishments
Cardstock
Hole Punch
Head over to the Diamond Press Facebook Page to stay up-to-date with their products as well as to see crafty projects made using it. And of course we think you’ll love using this too so we hope to see you over on IG entering the crafty giveaway! (will be live on Wednesday morning on March 23rd)