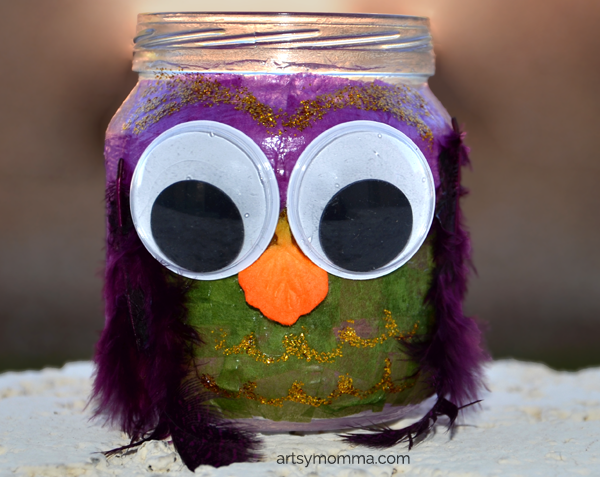
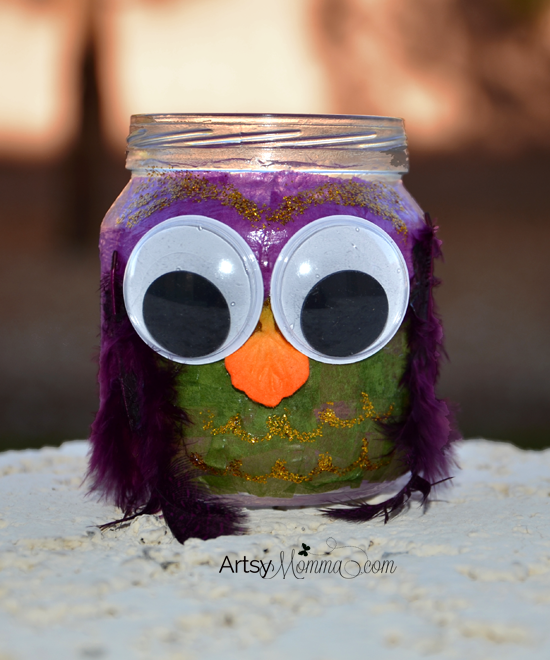
Decoupage Baby Food Jar Owl Craft for Kids
Who loves owls? We do! This month we are doing a tissue paper challenge with our blogging friends, and we chose to make a decoupage baby food jar owl craft. It’s perfect for kids of all ages – especially if you are making these with a group of kids who are are different ages. We love to upcycle baby food jars into something useful and/or creative. They can be used as party favors, for storing items, candy jar, candle holder, or just for decorative purposes.
What’s decoupage? Decoupage is an art technique of decorating surfaces with cutouts and also applying finishing coats on top – kind of like a sealer or varnish. We’ve done tissue paper on a bottle and magazine cutouts on a box in the past. You can also do bigger things such as a dresser or table.
How to make the Decoupage Baby Food Jar Owl
Supplies Needed:
- empty baby food jar (or any jar)
- scissors
- paintbrush
- Mod Podge (or mix white glue with water)
- tissue paper
- feathers
- jumbo googly eyes
- glitter glue
- orange felt, craft foam, or similar for beak
First we covered our work surface with newspaper. Choose the colors of tissue paper you would like to use and cut a small square section from it – 5 inches x 5 inches of each should be plenty. Cut these into strips and those into squares. This is a great way for preschoolers and kindergartners to practice using the scissors. Younger kids may like tearing the tissue paper instead.
Turn the baby food jar upside-down on the newspaper. Paint the Mod Podge all around the sides. Place on all the tissue paper. Ours started with the green belly area and then changed to the purple tissue paper for the rest. Add Mod Podge back over the tops of the tissue paper as your going to help stick it down and then one last coat over the entire surface when finished covering all the areas. Set aside to dry.
A few quick notes:
- See the whole process here with many different ages → baby food jar turkeys! My daughter is almost 3, my son is 6, and the other two kids are 7 and 8.
- Older kids can place their square all in a neat row while younger kids may just plop it on wherever which is fine too. In the past, I have always sat next to my then toddler or preschoolers with the paintbrush and pressed down any of the pieces that stuck up due to her overlapping/bunching the squares too much. It’s also helpful when there sticky fingers don’t let go over the piece they are pressing on.
- If you plan to use the finished owl jar for storing items with the lid on, be sure to keep the rim area free of tissue paper.
Once dry, glue on the jumbo googly eyes, orange beak, and feathers for the wings. Add small details with glitter glue if you’d like. Our own has little u-shapes on the belly area and glitter eyebrows.
Now it’s ready to be played with or used for storing items such as paperclips! Small candy such as m&m’s are also a fun idea, especially if used as a party favor.
Tissue Paper Challenge
This month’s crafty challenge is tissue paper! Incase you missed our previous ones, you can see our kids craft stars category here. We done an ocean theme, recycled cd challenge, egg cartons and many more. It’s fun to see everyone’s take on the same common supply or theme!
- Paper Plate Thanksgiving Turkey craft with Tissue Paper – Artsy Craftsy Mom
- How to Make Confetti – Pink Stripey Socks
- Pumpkin and Apple Tissue Paper Suncatchers – In the Playroom
- Tissue Paper Fall Tree Craft – I Heart Crafty Things
- Tissue Paper Black Cat – Glued to My Crafts Blog
- Tissue Paper Roses – Easy Peasy and Fun
- Tissue Paper Dragonfly – Crafty Morning
- Firefly Suncatcher Craft – I Heart Arts n Crafts
Stay updated with craftiness from the whole group by following the Kids Crafts Stars board on Pinterest or by following the hashtag #kidscraftstars on Instagram.
For more tissue paper baby food jar craft inspiration, see our lanterns and candle holders!


Amanda, I love this!! The cutest owl craft.
Thanks Heather! My hubby didn’t know what it was when I showed him …lol!